# Map AI Chat
# Usage
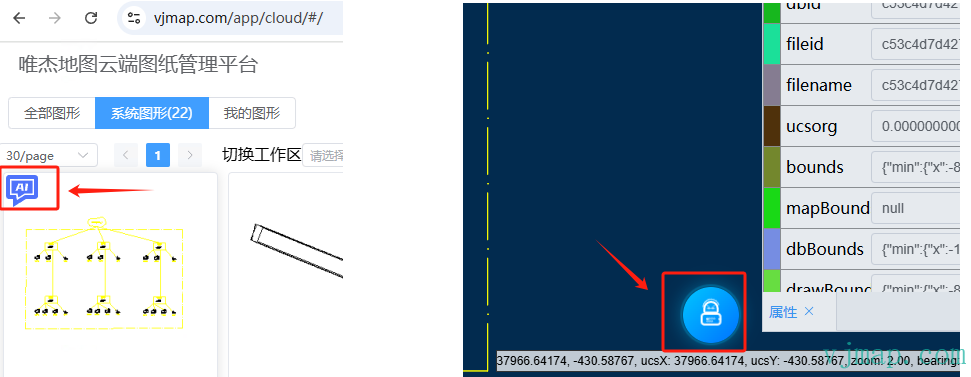
Go to VJMap Cloud Management Platform (opens new window), click the AI icon on each map to have an AI chat with that map; or after opening a map, click the AI chat icon in the lower-right corner.
Click to open online experience (opens new window)
Watch video tutorial https://www.bilibili.com/video/BV1dGNreCEA8/ (opens new window)
AI auto-generates CAD temperature curve chart https://www.bilibili.com/video/BV1JtKjenEhF (opens new window) Blog post (opens new window)
# Installation
Load vjchat via dynamic script (recommended, reduces initial page load script size):
// Load vjchat library
  // @ts-ignore
  if (typeof vjchat !== "object") {
    // vjchat.umd.js depends on vjmap; set vjmap on window after importing
    window.vjmap = vjmap;
    // Load script if not present
    await vjmap.addScript([{
        src: "https://vjmap.com/server/_cloud/lib/vjchat.umd.js"
    }])
  }
  // @ts-ignore
  let aiChat = vjchat.attachMap(map, vjmap, {
      title: "VJMap AI Chat", // title
      context: context, // override default context
      theme: {
        mode: "dark"
      },
      silent: false,
      hiddenUI: false,
      resizable: true,
      minimizePosition: "right",
      position: { right: 10, top: 100 },
      size: { width: 420, height: 500 },
      buttonControl: {
        position: "top-left",
        left: -40,
        top: 5
      },
      opacity: 0.8, // opacity
      onClose: () => {
        // callback when closed
      }
  })

  // destroy
  // aiChat.destroy();
2
3
4
5
6
7
8
9
10
11
12
13
14
15
16
17
18
19
20
21
22
23
24
25
26
27
28
29
30
31
32
33
34
35
36
Or install via npm install vjchat:
import { attachMap } from "vjchat"
attachMap(map, vjmap, {
      title: "VJMap AI Chat", // title
      ... // same options as above
  })
2
3
4
5
# How It Works
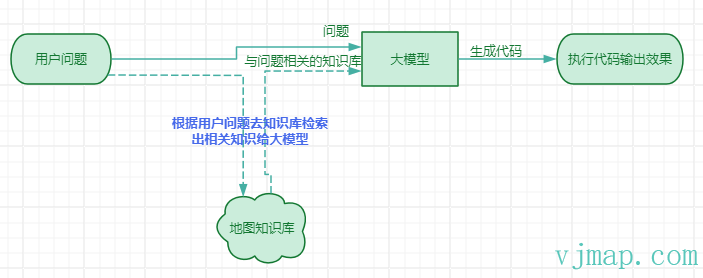
- User enters a question or requirement
- The system retrieves knowledge related to the question from the knowledge base
- The LLM generates corresponding code based on the user's question and retrieved knowledge
- The frontend parses and executes the code to display the result
# Questioning Tips
Because the LLM generates code based on the question and matched knowledge base, whether the question can automatically match relevant knowledge is the key prerequisite for correct answers. (It is recommended to enable "Knowledge Base Search Result Confirmation" in settings to confirm the auto-matched knowledge base before each response.)
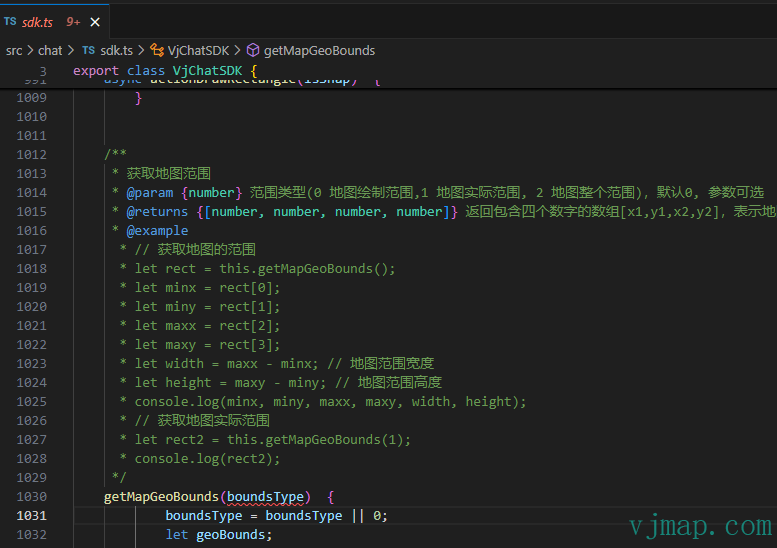
You can click Export Project Template in the AI chat toolbar Click to download project code (opens new window), and view the full code knowledge base in src\chat\sdk.ts.
The key to questioning is to match function descriptions in the documentation as closely as possible, and when one sentence involves multiple requirements, use punctuation such as commas to separate them.
Below are examples of incorrect vs correct questioning:
- [✗] Add a blue marker in the middle
- [✓] In the center of the map bounds, add a blue point marker
Explanation: Adding a point marker in the center involves two functions from the knowledge base: getMapGeoBounds (get map bounds) and addMarker (add point marker). So the question must mention map bounds to get the center position. Also, this sentence has two requirements—separate them with commas.
- [✗] Create a red circle
- [✓] Create a new map via JSON data, create a circle with center point [10,10], radius 5, and color red
Explanation: Creating a circle could mean creating a circle via frontend circle symbol or creating a CAD circle object via backend JSON. So clarify the requirement, which should be findable in the documentation. Also specify drawing parameters such as position.
- [✗] Collect point coordinates, input sensor name and value, create Marker that can be clicked to view attributes.
- [✓] 1. Collect a point coordinate and get the point. 2. Pop up an input dialog, input sensor name and value, get return value data. 3. Create a Marker at the point position, draggable, data content is data, popup content is data, displayed in form format.
Explanation: For complex requirements, break them into steps and use related variables to explain.
# Tutorial
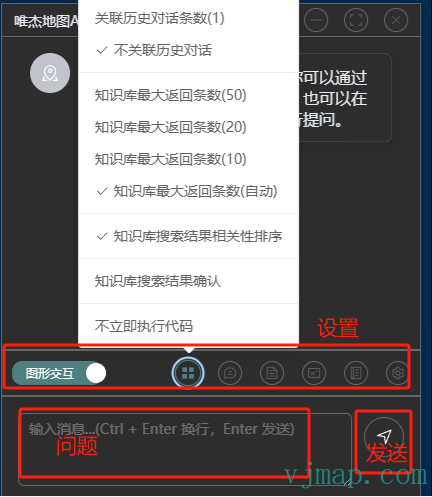
# Graphic Interaction vs Chat Mode
Graphic interaction retrieves the knowledge base and automatically executes the LLM-generated code to operate on the map.
Chat mode only chats with the LLM (does not retrieve the knowledge base) and does not execute code operations.
# Do Not Execute Code Immediately
When checked, code will not execute immediately; you need to manually click Execute Code, or click Edit Code and then execute.
# Knowledge Base Search Result Confirmation
The system retrieves knowledge related to the user's question from the knowledge base. Sometimes irrelevant knowledge or no relevant knowledge is found. In such cases, you can enable Knowledge Base Search Result Confirmation to manually select relevant knowledge.
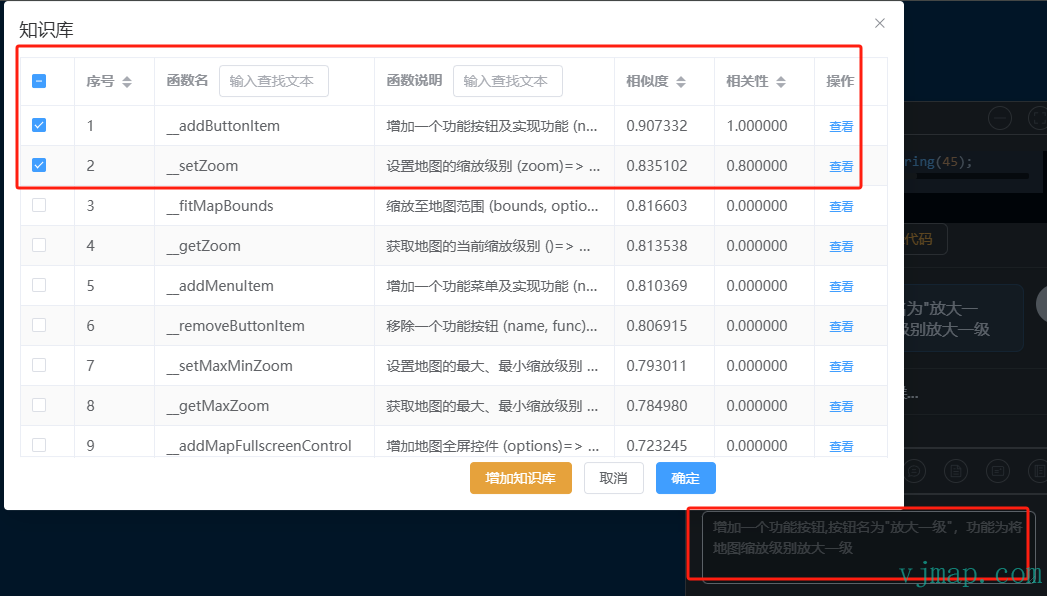
For example, when entering "Add a function button, button name is zoom in one level, function is to zoom the map one level", the system will automatically select the two related function knowledge bases. You can then manually select and confirm before handing off to the LLM.
# Knowledge Base Search Result Relevance Ranking
Post-sort knowledge base by relevance (recommended to enable).
# Maximum Knowledge Base Return Count
Maximum number of knowledge base items to fetch from the database before relevance ranking.
# Associate History Chat Data
By default, history chat is not associated—previous input and output do not affect the next. There is no context. You can enable this in settings if needed.
# LLM Settings
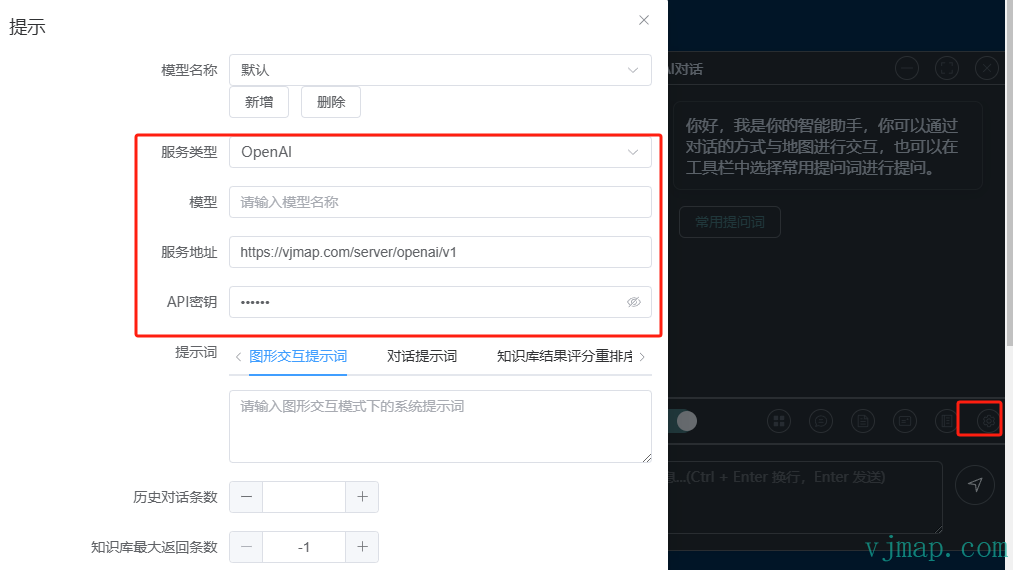
By default, the VJMap backend LLM service API is called. For private deployment without the VJMap backend LLM service, or to use your own applied or deployed LLM, you can customize the LLM API address in the frontend settings.
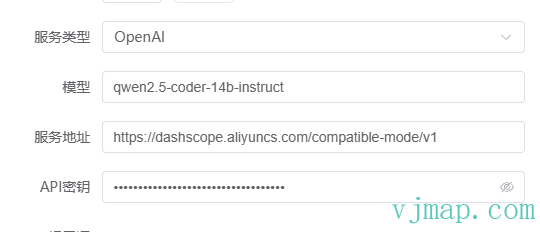
Currently supports ollama and openAI compatible APIs. Configuration examples:
Setting qwen2.5 openAI model:
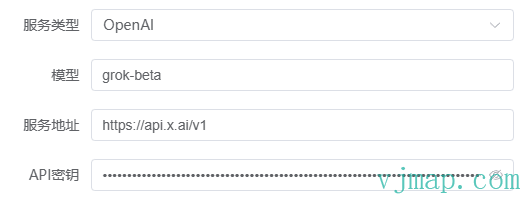
Using XAI openAI model:
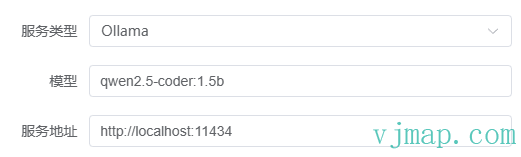
Using locally deployed ollama model:
# Paste Last User Input
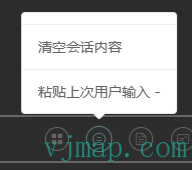
To modify and re-ask based on the last input, click "Paste Last User Input".
# Clear Session Content
Clears all content in the session. (After clearing, you can view history in the history record.)
# Undo Last Operation
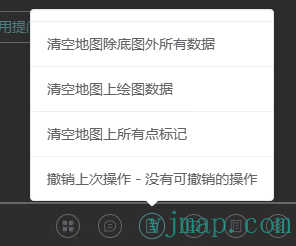
Click Undo Last Operation to undo the result of the last executed code. (Note: Some steps cannot be undone.)
# Clear All Map Data Except Base Map
Click to clear all data on the map except the base map.
# Clear Map Drawing Data
Click to clear all data on the map's draw layer.
# Clear All Point Markers on Map
Click to clear all point markers on the map.
# Export Project Template
Can export as a Vue3 project template for debugging and viewing the full SDK code. You can also add user business code to the project for AI chat.
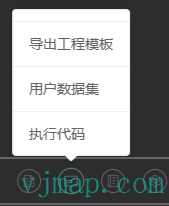
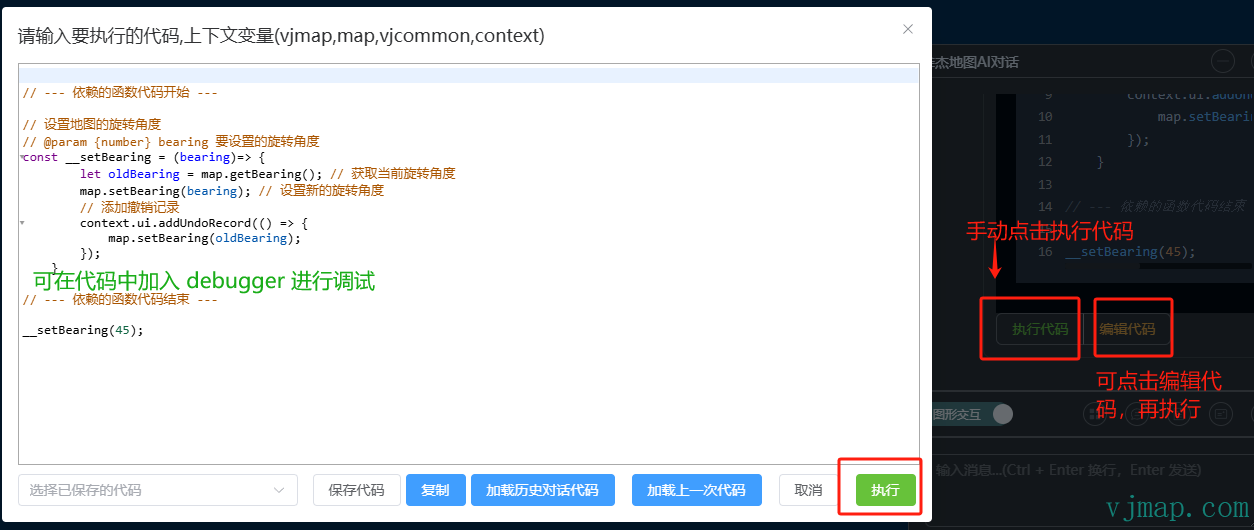
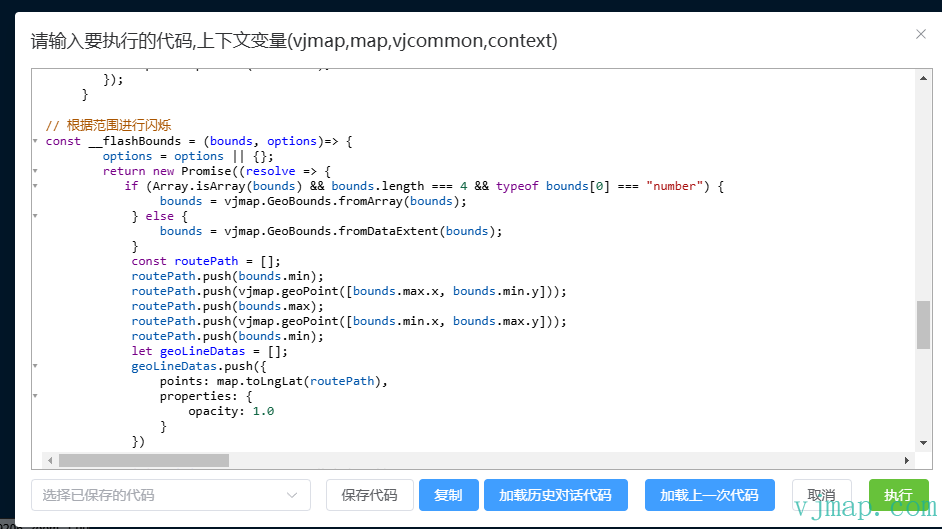
# Execute Code
Can load historical chat code or load the last code, edit the code, and click Execute. You can add debugger in the code for debugging.
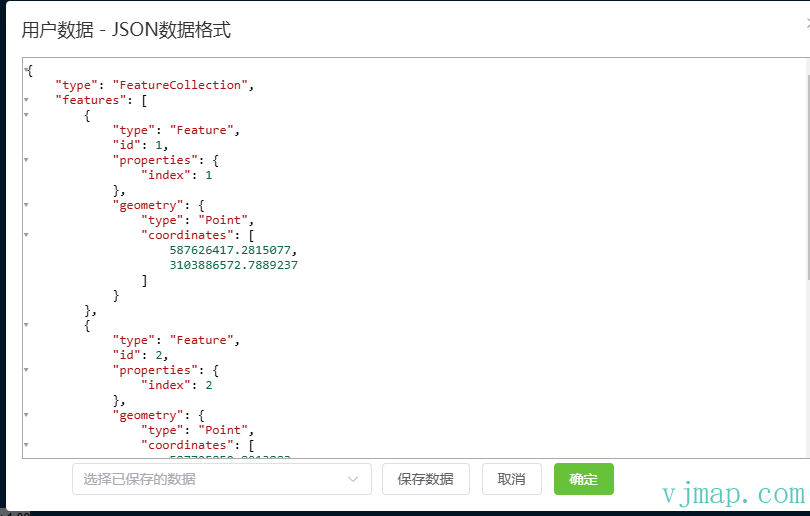
# User Dataset
User dataset refers to GeoJSON data that you enter in advance in this interface. When you enter "Get user data" in the AI dialog, this data will be retrieved.
For example, if you have a set of GeoJSON data and need to annotate the points in the GeoJSON with Markers on the map, you can copy the GeoJSON to the "User Dataset" window in advance.
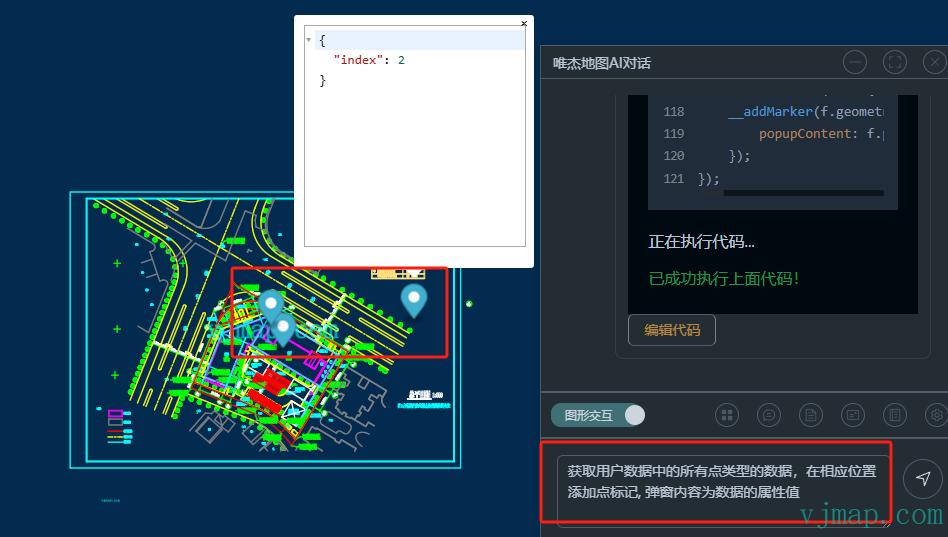
Enter "Get all point-type data from user data, add point markers at corresponding positions, popup content is the data attribute values" to ask. Execution result:
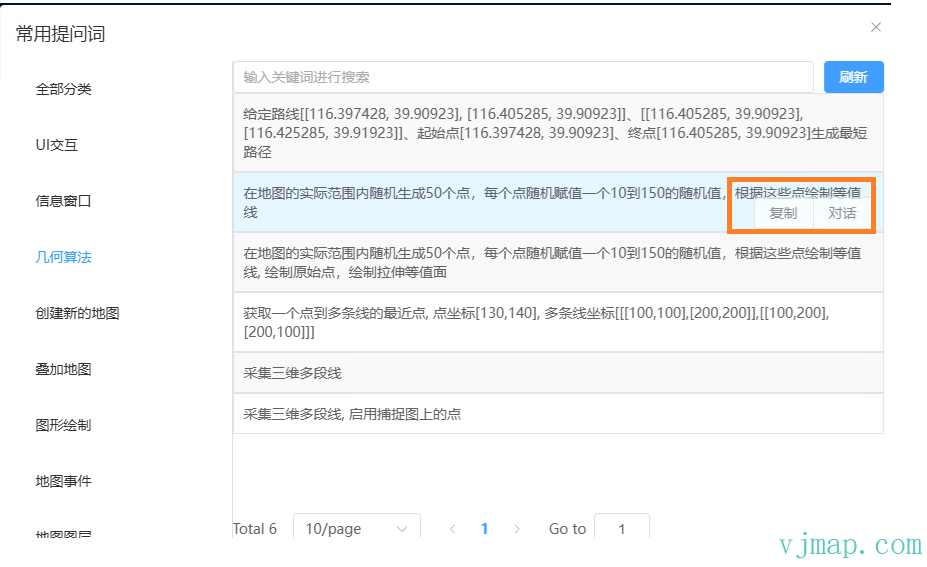
# Common Questions
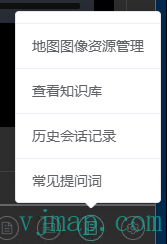
Click a common question and then click "Chat" to start a direct conversation.
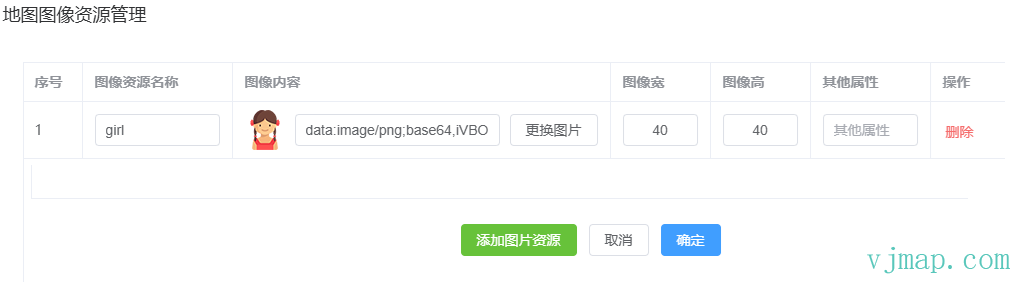
# Map Image Resource Management
When creating a symbol, image resources are needed. Define images in advance in Map Image Resource Management.
Default image names are _markerIcon_, _scatterDot_, _pulsingDot_.
For custom images, you can select a local image or enter SVG content.
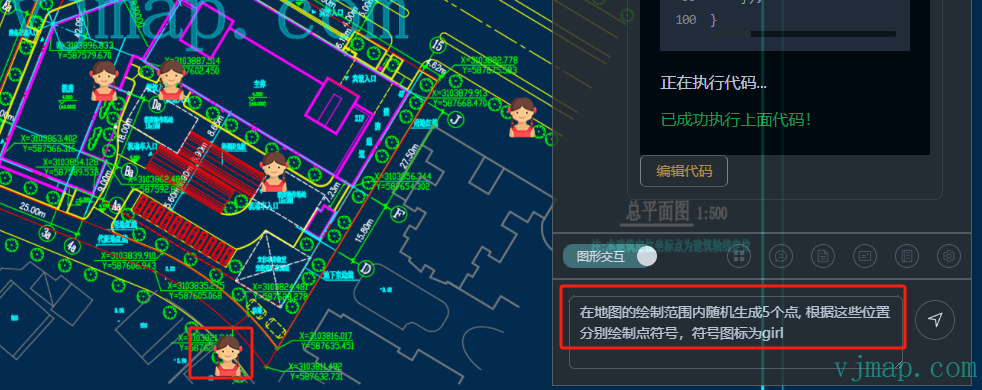
For example, upload a girl.png image and rename it to girl. Enter the question "Randomly generate 5 points within the map drawing bounds, draw point symbols at these positions, symbol icon is girl". Execution result:
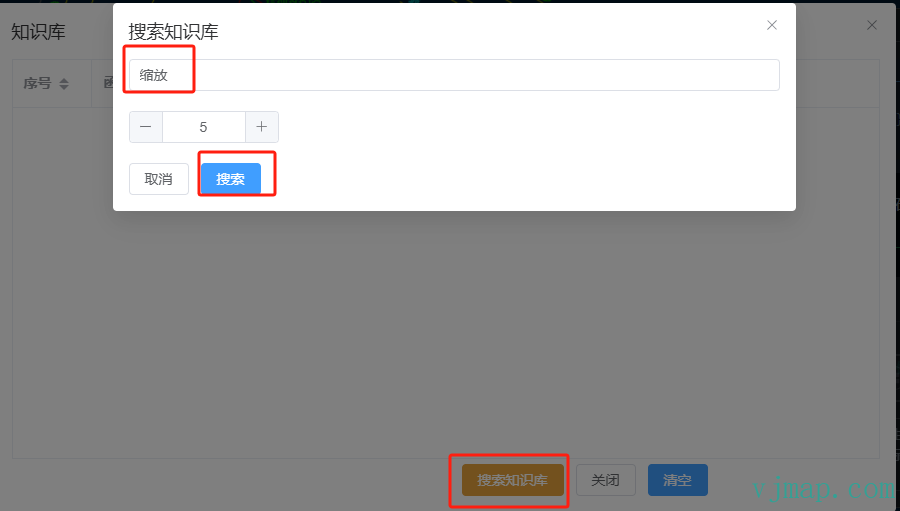
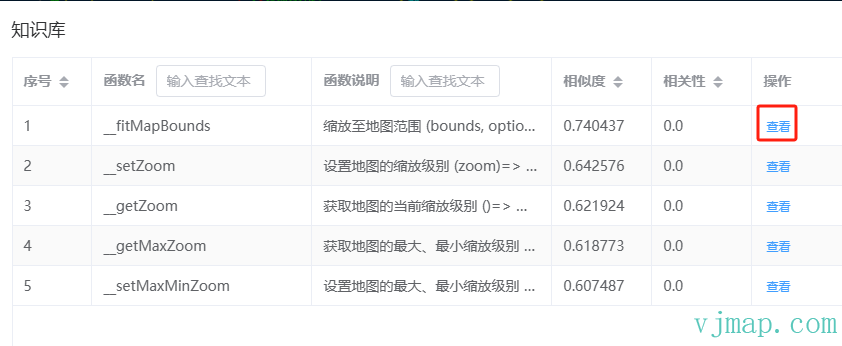
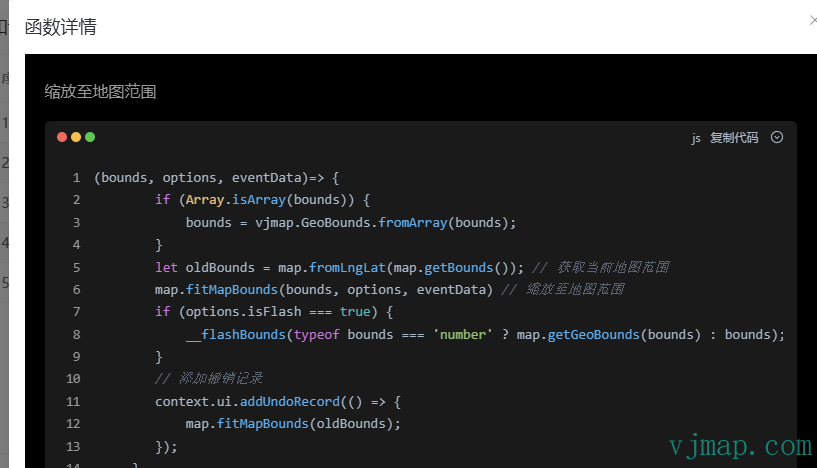
# View Knowledge Base
Click Search Knowledge Base, click the content to search, then click to view in the search results.
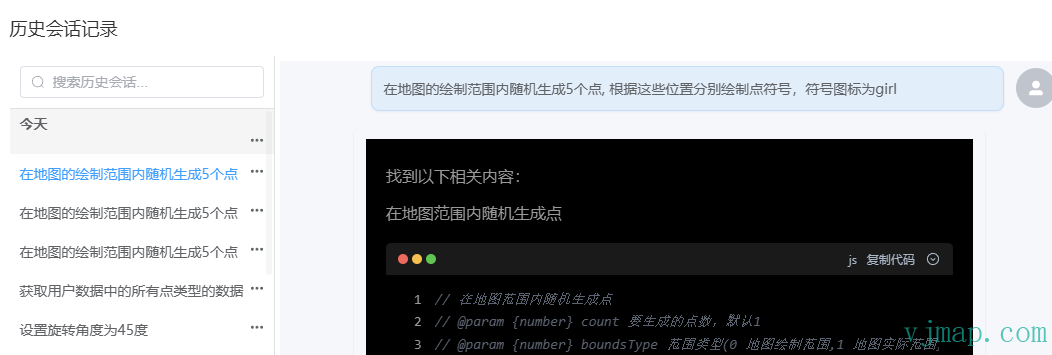
# History Session Records
# How to Use Online AI Sites to Generate Code for Free
Using online API interfaces consumes tokens and costs money. This method lets you use online AI sites to generate code for free:
- Enable "Generate question template only, do not auto-generate code" in settings
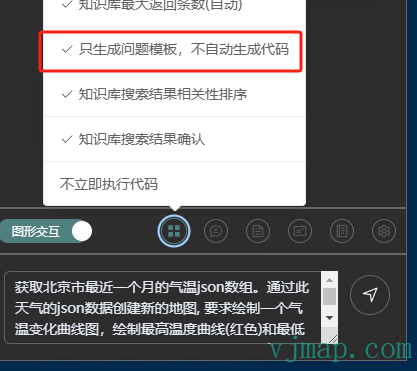
- Enable "Generate question template only, do not auto-generate code" in settings
- Enter your question in the input area, e.g.
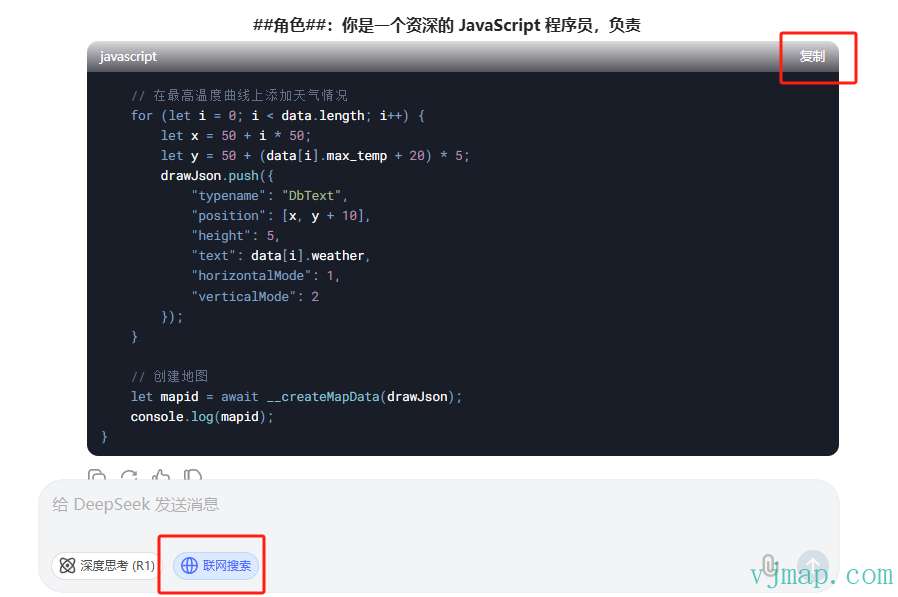
Get Beijing's temperature JSON array for the last month. Create a new map from this weather JSON, draw a temperature curve chart: max temperature curve (red) and min temperature curve (green), and write the weather condition above each point on the max curve. X-axis: date (with ticks). Y-axis: temperature (with ticks, min -20, max 40, step 5).
- Click Send to ask. In the
AI Questiondialog that appears, clickCopyto copy the question.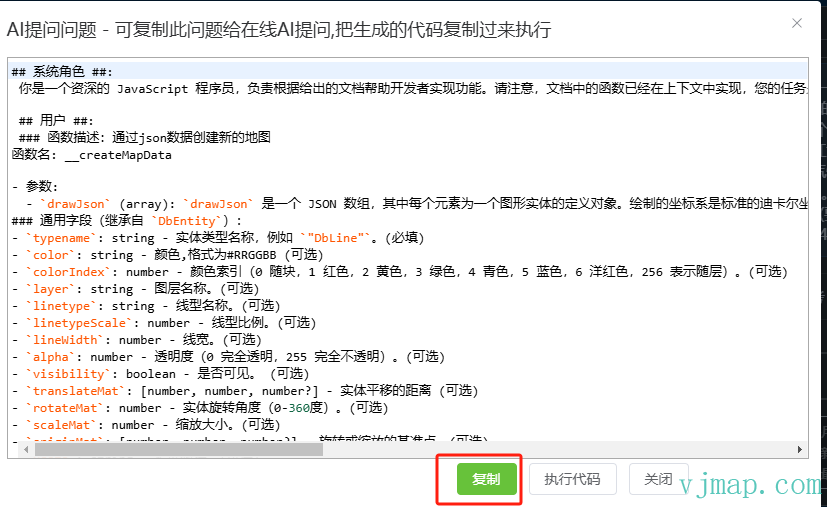
- Click Send to ask. In the
- Open an online AI site such as deepseek (opens new window), paste the copied content
- Copy the AI-generated code
- Copy the AI-generated code
- In the
AI Questiondialog clickExecute Codeor clickExecute Codein the toolbar menu, paste the copied code, click Execute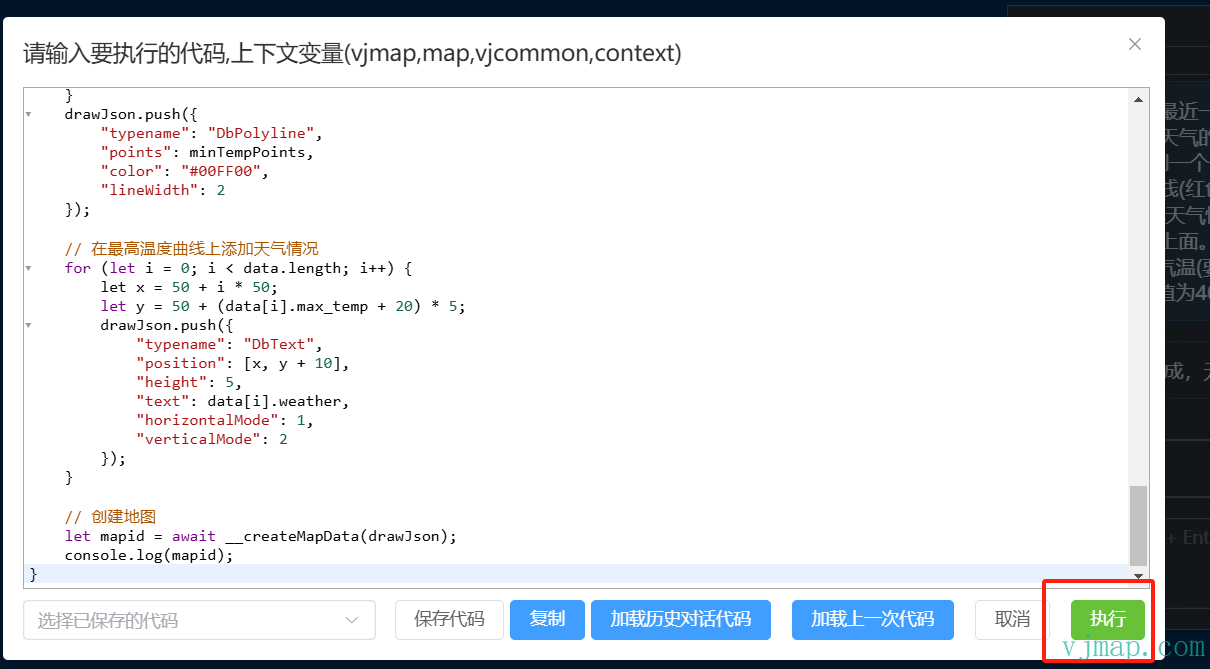
- In the
- Wait for the result to complete, then view the execution effect
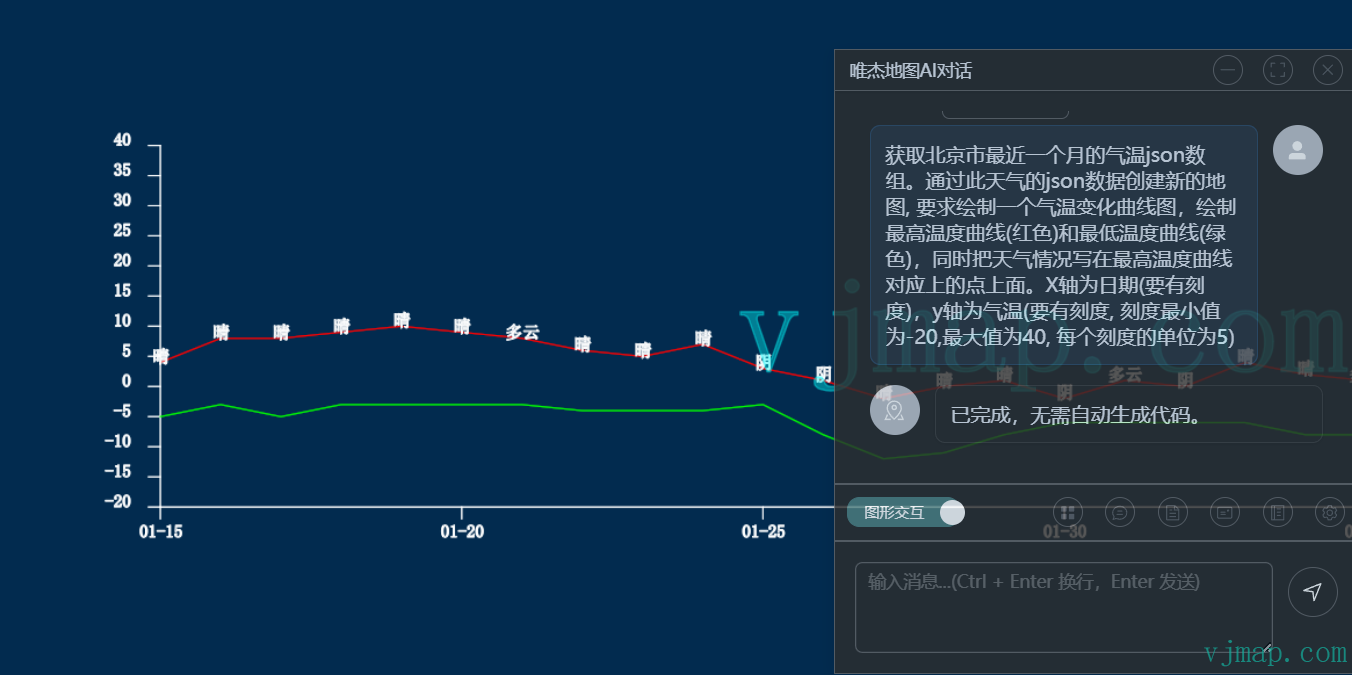
- Wait for the result to complete, then view the execution effect
# API Definition
attachMap function parameter definition:
export type ThemeMode = 'light' | 'dark'

export interface ThemeConfig {
  mode?: ThemeMode
  primaryColor?: string
  borderColor?: string
  backgroundColor?: string
  containerBackground?: string
  textColor?: string
  codeBgColor?: string
}

export interface BaseChatOptions {
  type?: ModelType
  temperature?: number
  streamCallback?: (content: string) => void
  interactiveSystemPrompt?: string  // prompt for graphic interaction
  chatSystemPrompt?: string
  rankPrompt?: string;
  historyChatNum?: number
  topK?: number        // top-K for retrieval
  scoreThreshold?: number
  diableAutoExecCode?: boolean
  knowledgeConfirm?: boolean
  knowledgeRank?: boolean
  rankScoreThreshold?: number
  similarityScoreTopK?: number
  welcomePrompt?: string
}

export interface OllamaChatOptions extends BaseChatOptions {
  type: 'ollama'
  model: string
  baseUrl: string
}

export interface OpenAIChatOptions extends BaseChatOptions {
  type: 'openai'
  model: string
  apiKey: string
  baseUrl?: string
}

export type ChatOptions = OllamaChatOptions | OpenAIChatOptions
export interface ChatMapOptions {
  theme?: ThemeConfig;
  chat: ChatOptions;
  resizable?: boolean;
  silent?: boolean;
  hiddenUI?: boolean;
  userVectorDocs?: string;
  size?: {
    width: number;
    height: number;
  };
  position?: {
    left?: number;
    top?: number;
    right?: number;
    bottom?: number;
  };
  opacity?: number;
  minimizePosition?: 'left' | 'right';
  title?: string;
  historyChatNum?: number;
  topK?: number;
  scoreThreshold?: number;
  onClose?: () => void;
}

const defaultThemes: Record<ThemeMode, ThemeConfig> = {
  light: {
    primaryColor: '#409eff',
    borderColor: '#c0c4cc',
    backgroundColor: '#f5f7fa',
    containerBackground: '#ffffff',
    textColor: '#303133',
    codeBgColor: '#f6f8fa'
  },
  dark: {
    primaryColor: '#507F80',
    borderColor: '#666668',
    backgroundColor: '#2d2d2d',
    containerBackground: '#1e1e1e',
    textColor: '#e5eaf3',
    codeBgColor: '#282c34'
  }
}

// Default options
const defaultOptions: Partial<ChatMapOptions> = {
  size: {
    width: 600,
    height: 500
  },
  opacity: 0.8,
  minimizePosition: 'right'
}
2
3
4
5
6
7
8
9
10
11
12
13
14
15
16
17
18
19
20
21
22
23
24
25
26
27
28
29
30
31
32
33
34
35
36
37
38
39
40
41
42
43
44
45
46
47
48
49
50
51
52
53
54
55
56
57
58
59
60
61
62
63
64
65
66
67
68
69
70
71
72
73
74
75
76
77
78
79
80
81
82
83
84
85
86
87
88
89
90
91
92
93
94
95
96
97
98