threejs材质
threejs材质
原文地址 https://juejin.cn/post/7224112064461144123?share_token=318184dc-f3af-40ac-b282-97ef2e9147cc
课件地址
https://github.com/buglas/threejs-lesson
课堂目标
- 理解three.js中材质的基本用法
- 可以基于实际需求按需选择合适的材质
知识点
- MeshBasicMaterial
- MeshLambertMaterial
- MeshLambertMaterial
- MeshPhongMaterial
- MeshStandardMaterial
- MeshPhysicalMaterial
- MeshToonMaterial
- ShadowMaterial
- MeshDepthMaterial
- MeshNormalMaterial
- PointsMaterial
- LineBasicMaterial
- LineDashedMaterial
- SpriteMaterial
- Material
- ShaderMaterial
- RawShaderMaterial
1-材质的概念
材质就是物体在场景中的表现形式,它不会改变物体的形状。
材质所展现出的效果会受模型自身的特性、光线、视线等因素的影响。
不同的材质,所体现出来的差异有颜色、反射、折射、光泽度、透明度等多个方面。
three.js 中提供许多很实用的内置材质,当然,大家若觉得不够用,也可以在three.js 中自定义材质。
我们先整体看一下three.js中的材质对象。
3个普通材质:
- MeshBasicMaterial:不受灯光对象影响的材质
- MeshLambertMaterial:石膏效果,无高光
- MeshPhongMaterial: 塑料效果,有高光
2个PBR材质,PBR材质会让物体更加真实:
- MeshStandardMaterial 标准材质
- MeshPhysicalMaterial 物理材质
一些特殊材质:
MeshToonMaterial 卡通材质,可以制作卡通效果。
它会是模型在着色的时候,只使用固定的几种色调,从而使其着色效果看起来不是那么平滑。
ShadowMaterial 阴影材质,用于获取创建阴影的数据。
MeshDepthMaterial 深度材质,渲染每个像素的深度。
处在摄像机负近端面的像素其深度为0,处在摄像机负远端面的像素其深度为1。
MeshNormalMaterial 法线材质,会显示几何体的法线。
法线是一个特定的三角形或像素所面对的方向。
……
2个自定义材质:
- ShaderMaterial 自定义材质,three.js会从旁辅助。
- RawShaderMaterial 原始材质,比ShaderMaterial 材质更加原生和灵活,可以用来制作完全自定义的着色器,不需要three.js的帮助。
接下来我们具体说一下上面的材质。
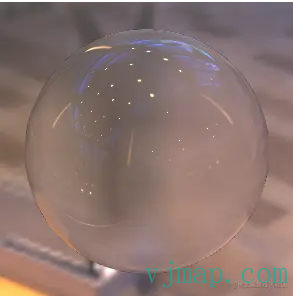
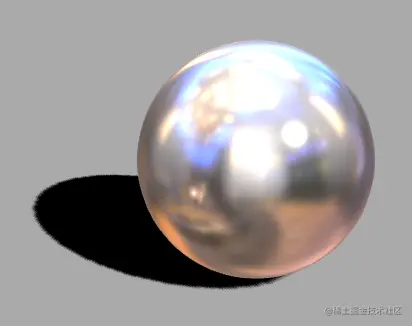
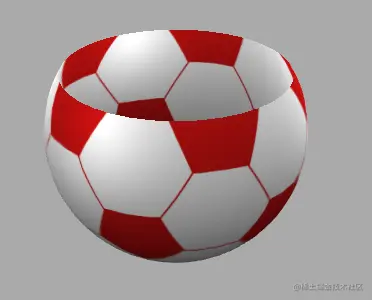
2-MeshBasicMaterial
MeshBasicMaterial 不受灯光对象影响,但这并不代表它不具备光照效果。
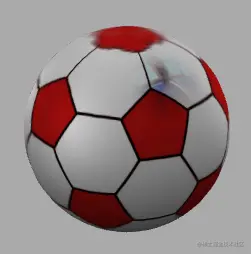
我们通过先一个足球案例说一下MeshBasicMaterial材质。
2-1-MeshBasicMaterial 材质的建立和属性的设置
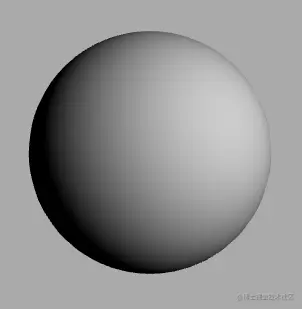
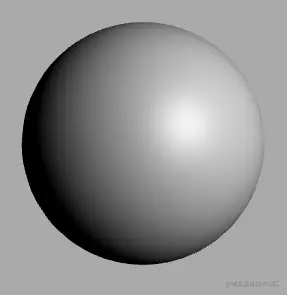
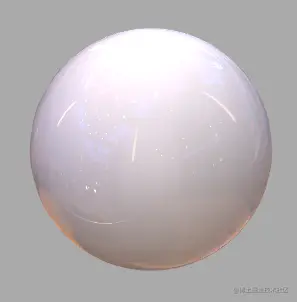
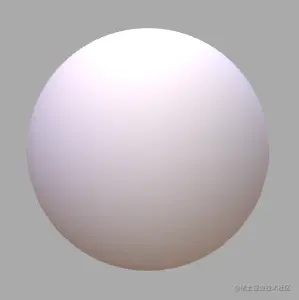
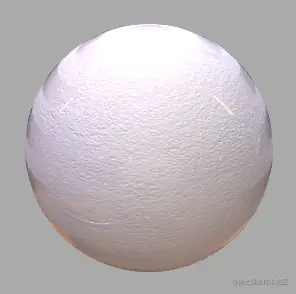
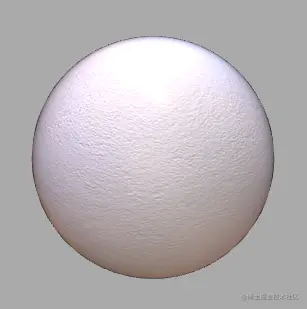
1.建立MeshBasicMaterial,并将其交给一个球体。
const mat = new MeshBasicMaterial()
const sphere = new Mesh(sphereGeometry, mat)
scene.add(sphere)
效果如下:
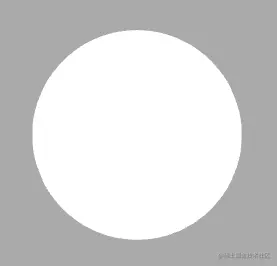
默认是一个白球。
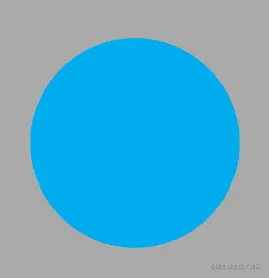
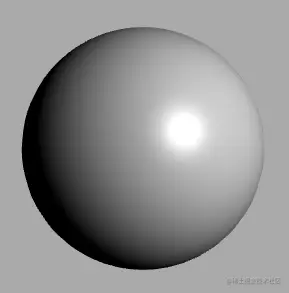
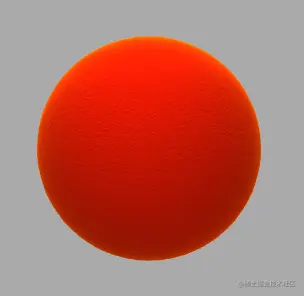
2.设置材质的属性。
我们可以在实例化材质的时候设置其属性,比如将材质颜色设置为蓝色:
const mat = new MeshBasicMaterial({
    color: '#00acec',
})
效果如下:
我们也可以通过材质对象来设置属性:
mat.color = new Color('#00acec')
这和上面的效果是一样的。
材质的颜色可以用16进制的颜色值来定义,也可以用css颜色定义。
const mat = new MeshBasicMaterial({
    color: '#00acec',
    color: 'blue',
    color: 'rgb(255,0,0)',
    color: 'hsl(100,100%,50%)',
})
mat.color.set('#00ff00')
mat.color.set('blue')
mat.color.set('rgb(255,0,0)')
mat.color.set('hsl(100,100%,50%)')
关于材质的建立和属性的设置方法就是这样,接下来咱们看一下MeshBasicMaterial材质的常见属性。
2-2-MeshBasicMaterial材质的常见属性
MeshBasicMaterial材质的颜色我们在上面说过了,接下咱们看一下其它属性。
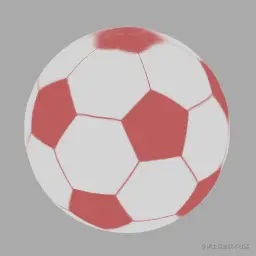
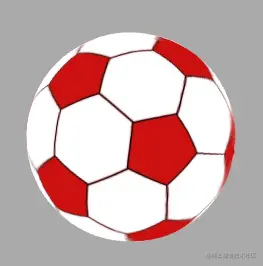
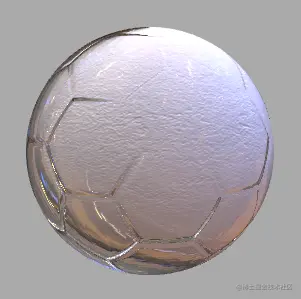
1.map 贴图
先准备一张贴图,这张贴图会按照等距圆柱投影的原理映射到球体上,此原理我在webgl里给大家讲过。
通过TextureLoader 加载贴图,并生成纹理对象。
const textureLoader = new TextureLoader()
const ballColorTexture = textureLoader.load('/textures/ball/color.jpg')
把纹理对象交给材质的map属性。
const mat = new MeshBasicMaterial({
    color: '#00acec',
})
mat.map = ballColorTexture
效果如下:
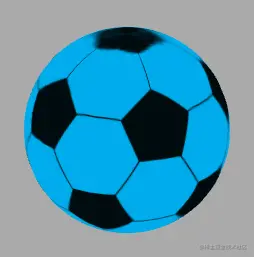
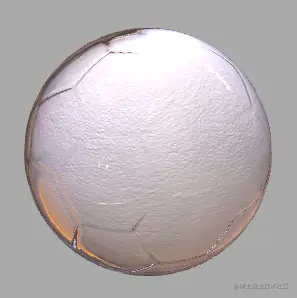
默认map 会与color进行合成,我们将color保持默认的白色,map 便不会受color影响。
const mat = new MeshBasicMaterial()
mat.map = ballColorTexture
效果如下:
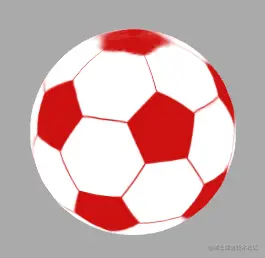
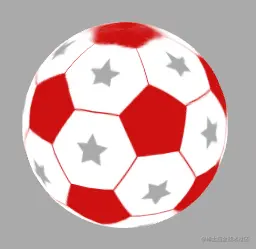
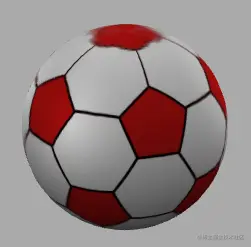
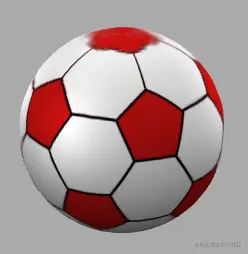
这是我自己魔改的一个颜色为中国红的足球,其顶部图案不是正五边形,而是一朵饱经风霜的梅花:
以此寓意“宝剑锋从磨砺出,梅花香自苦寒来”,希望中国足球无畏严寒,冲出亚洲,走向世界。
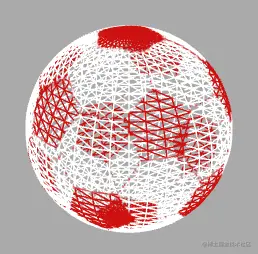
2.wireframe 三角网
mat.wireframe = true
效果如下:
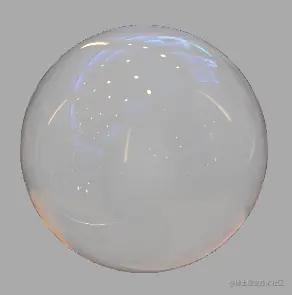
3.透明度
我们可以设置材质的整体透明度,也可以通过贴图控制材质的透明度。
在设置透明度之前,需要先开启材质的transparent 属性。
mat.transparent = true
- opacity 整体透明度
const mat = new MeshBasicMaterial()
mat.map = ballColorTexture
mat.transparent = true
mat.opacity = 0.5
效果如下:
- 透明贴图
const mat = new MeshBasicMaterial()
mat.map = ballColorTexture
mat.transparent = true
mat.alphaMap = ballAlphaTexture
效果如下:
其使用的透明度贴图如下:
其原理是黑透白不透。
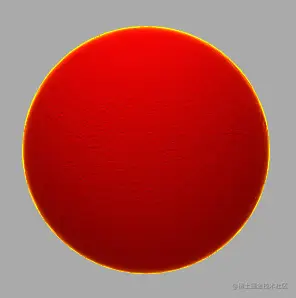
4.side 渲染哪一面,默认为THREE.FrontSide。其他选项有THREE.BackSide 和 THREE.DoubleSide。
//双面
mat.side = DoubleSide
效果如下:

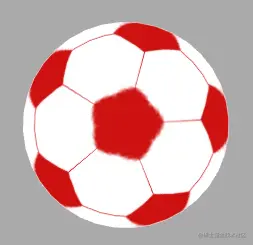
5.aoMap 可增加材质暗部的细节,需要第二组UV。
启用第二组UV的方法如下:
const sphereGeometry = new SphereGeometry(1, 36, 36)
sphereGeometry.setAttribute('uv2', sphereGeometry.attributes.uv)
这是在将一组缓冲数据传递给名称为uv2 的attribute 变量。
uv2是three.js 提前在着色器里起好的名字,不能改。
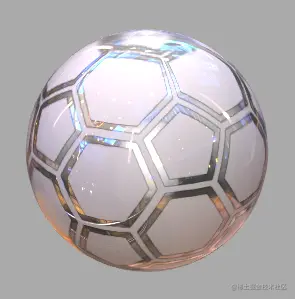
接下来正常把ao贴图赋值给材质的aoMap材质即可。
const mat = new MeshBasicMaterial()
mat.map = ballColorTexture
mat.aoMap = ballAmbientOcclusionTexture
mat.aoMapIntensity = 1
上面的aoMapIntensity是控制ao强度的。
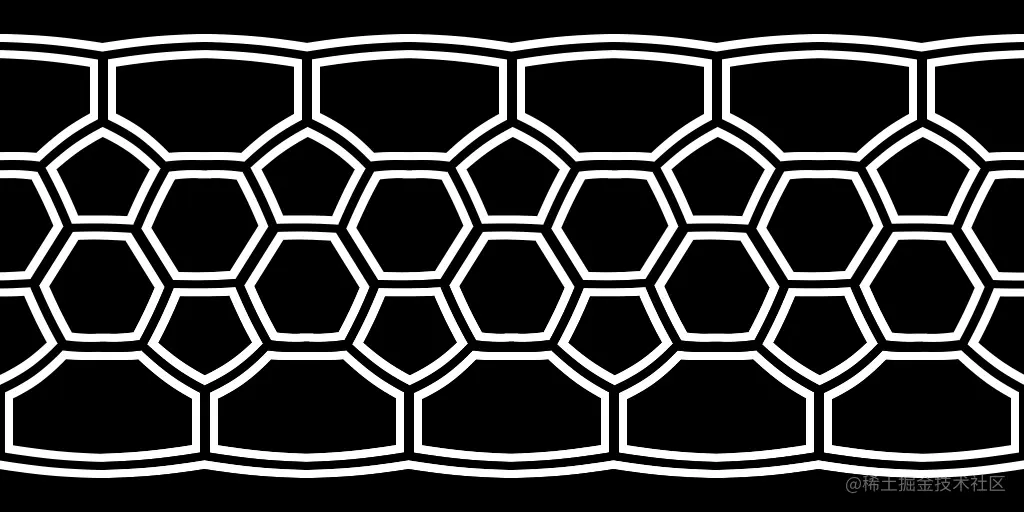
ballAmbientOcclusionTexture 纹理对象里的图片如下:
渲染效果如下:
由上面的效果可见,足球较暗的缝隙颜色变深了。
6.lightMap 灯光贴图
我用photoshop批了个摄影棚:
接下来我们把这个摄影棚交给lightMap:
const lightTexture = textureLoader.load('/textures/ball/light.jpg')
const mat = new MeshBasicMaterial()
mat.map = ballColorTexture
mat.aoMap = ballAmbientOcclusionTexture
mat.lightMap = lightTexture
效果如下:
现在这个模型就已经有了光感,我们可以通过lightMapIntensity 属性控制灯光贴图的强度。
mat.lightMapIntensity = 1.3
效果如下:
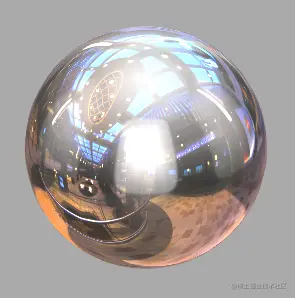
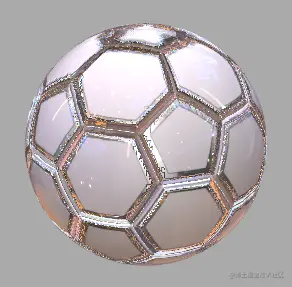
7.envMap 环境光贴图,可以让模型更加逼真。
准备一张环境光贴图:
把环境光贴图交给材质:
……
const shopTexture = textureLoader.load('/textures/environment/shop.jpg')
shopTexture.mapping = EquirectangularReflectionMapping

const mat = new MeshBasicMaterial()
mat.map = ballColorTexture
mat.aoMap = ballAmbientOcclusionTexture
mat.lightMap = lightTexture
mat.lightMapIntensity = 1.3
mat.envMap = shopTexture
上面的EquirectangularReflectionMapping 就是在将等距圆柱投影贴图投射到球体之上。
效果如下:
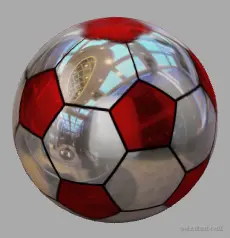
现在这个足球像镀了一层镉。
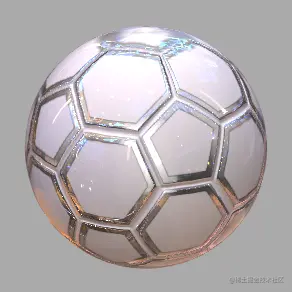
reflectivity 属性可以控制球体对环境光的反射强度。
mat.reflectivity = 0.1
效果如下:
我们当前用过的环境光贴图的格式是jpg的,其好处是渲染成本低。
不过相较于hdr格式的环境光,jpg是没有光源的。
所以,你若想提升渲染效果,可以使用hdr格式的环境光。
8.使用hdr格式的环境光。
引入RGBELoader(hdr文件不能再用TextureLoader引入了)。
import { RGBELoader } from 'three/examples/jsm/loaders/RGBELoader'
加载hdr贴图。
new RGBELoader().loadAsync('/textures/environment/shop.hdr').then((texture) => {
    texture.mapping = EquirectangularReflectionMapping
    mat.envMap = texture
})
效果如下:
在上面的球体上我们可以看到明显的灯光。
解释一下hdr中灯光的概念。
可能有同学会觉得图片里亮的地方不就是灯光了,要hdr有何用?
这是因为hdr里的灯光是和普通的图像数据分开存储的,不像jpg那样,所有的数据都混合到了一起。
这样hdr里的灯光在渲染的时候就会受到特殊对待,比如它即使处于阴影中,也依旧看得见。
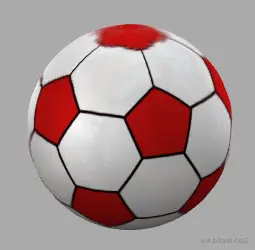
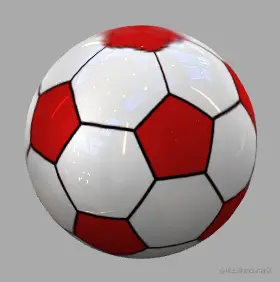
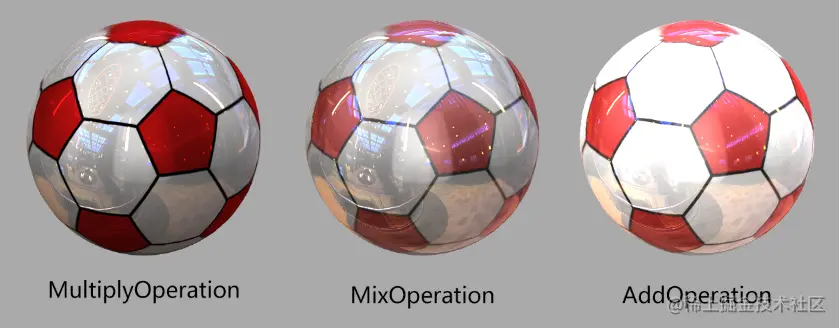
9.combine 物体表面的颜色与envMap的合成方式。
选项为THREE.MultiplyOperation(默认值),THREE.MixOperation, THREE.AddOperation。
// 反射
mat.reflectivity = 0.5

// 表面颜色与envMap的合成方式
mat.combine = MultiplyOperation
// mat.combine = MixOperation
// mat.combine = AddOperation
这种参数效果如下:
10.specularMap 高光贴图
准备一张高光贴图:
把高光贴图交给材质:
const ballSpecularTexture = textureLoader.load('/textures/ball/specular.jpg')
const mat = new MeshBasicMaterial()
mat.map = ballColorTexture
mat.aoMap = ballAmbientOcclusionTexture
mat.lightMap = lightTexture
mat.envMap = shopTexture
mat.specularMap = ballSpecularTexture
效果如下:
就当前效果来看,高光贴图更像是对反射贴图的遮罩。
11.fog 是否受雾效影响,默认为true。
我们可以开启场景的雾效。
scene.fog = new Fog(0xffffff, 3, 10)
效果如下:

将当前材质的fog设置为false,便不再受雾效影响。
scene.fog = new Fog(0xffffff, 3, 10)
mat.fog = false
效果如下

现在MeshBasicMaterial材质的基本属性算是说的差不多了。
12.MeshBasicMaterial材质还有一个refractionRatio折射属性,但我使用后没有效果,其原因我未做深入研究,所以先放着了。知道原因的同学可以微信(1051904257)告诉我,我们一起学习。
// 折射-不好使
mat.refractionRatio = 0.2
textureLoader.load('/textures/environment/shop.jpg', (texture) => {
    texture.mapping = EquirectangularReflectionMapping
    mat.envMap = texture
})
现在MeshBasicMaterial材质的基本属性算是说的差不多了,除此之外它还有一些继承自Material对象的属性,比如颜色合成、模板缓冲区、深度冲突等相关的属性,这个我们后面会说。
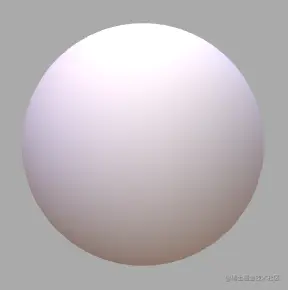
3-MeshLambertMaterial
MeshLambertMaterial 是一种可感光、无光泽、无高光的材质。
MeshLambertMaterial 是比MeshBasicMaterial更高一级的材质,它拥有后者所有功能。
我们画一个MeshLambertMaterial材质的球体看看。
const sphereGeometry = new SphereGeometry(1, 36, 36)
const mat = new MeshLambertMaterial()
scene.add(new Mesh(sphereGeometry, mat))
在没有打灯的情况下,其效果是黑的:
在场景中打一盏平行灯。
const light = new DirectionalLight(0xffffff, 0.8)
light.position.set(10, 10, 10)
scene.add(light)
效果如下:
我们可以让物体自发光。
mat.emissive = new Color(0xffffff)
这样物体就变成了纯白色:
我们可以控制自发光强度。
mat.emissiveIntensity = 0.3
效果如下:
emissiveIntensity默认为1,此时的物体不受光照影响,emissive可以当成MeshBasicMaterial里的color来用。
我们可以给物体一个自发光贴图。
const textureLoader = new TextureLoader()
const ballColorTexture = textureLoader.load('/textures/ball/color.jpg')
mat.emissiveIntensity = 0.3
mat.emissiveMap = ballColorTexture
效果如下:
当MeshLambertMaterial 的emissive 为白色,color 为黑色,emissiveIntensity 为1时,emissiveMap 可以当成MeshBasicMaterial里的map来用。
mat.emissive = new Color(0xffffff)
mat.color = new Color(0x000000)
mat.emissiveIntensity = 1
mat.emissiveMap = ballColorTexture
效果如下:
4-MeshPhongMaterial
MeshPhongMaterial 是一种具有镜面高光、表面光泽的材质。
MeshPhongMaterial 是比MeshLambertMaterial 更高一级的材质,它拥有后者所有功能。
我们画一个MeshPhongMaterial 材质的球体看看。
/* 几何体 */
const sphereGeometry = new SphereGeometry(1, 36, 36)
/* 材质 */
const mat = new MeshPhongMaterial()

scene.add(new Mesh(sphereGeometry, mat))

/* 灯光 */
const light = new DirectionalLight(0xffffff, 0.8)
light.position.set(10, 10, 10)
scene.add(light)
效果如下:
现在的球体已经有了一个高光。
shininess 可以控制高光大小,其默认值是30,此值越小高光越散,反之则越小。
mat.shininess = 60
效果如下:
specular 可以设置高光颜色,默认值为0x111111(深灰色)。
mat.specular = new Color(0x00acec)
效果如下:

specularMap 可以给高光一个贴图。
/* 贴图 */
const textureLoader = new TextureLoader()
const marbleTexture = textureLoader.load('/textures/stone/marble-01.jpg')

/* 几何体 */
const sphereGeometry = new SphereGeometry(1, 36, 36)

/* 材质 */
const mat = new MeshPhongMaterial()
// 高光大小
mat.shininess = 60
// 高光颜色
// mat.specular = new Color(0x00acec)
// 高光贴图
mat.specularMap = marbleTexture
marbleTexture 用的是大理石贴图:

效果如下:
此时的高光有了大理石的斑驳感。
现在普通材质我们说完了,接下来,我们说一下PBR材质。
5-MeshStandardMaterial
MeshStandardMaterial 一种基于物理的标准材质,使用Metallic-Roughness工作流程。
PBR有两种工作流程:
- Metallic-Roughness 金属度-光泽度
- Specular - Glossiness 镜面反射-光泽度
这两种工作流没有优劣之分,只是一种选择问题。
一般为了获取比较好的效果,我们会给材质或整个场景添加环境贴图。
new RGBELoader().loadAsync('/textures/environment/shop.hdr').then((texture) => {
    texture.mapping = EquirectangularReflectionMapping
    scene.environment = texture
})
接下来我们画一个MeshStandardMaterial材质的球体。
/* 环境光 */
new RGBELoader().loadAsync('/textures/environment/shop.hdr').then((texture) => {
    texture.mapping = EquirectangularReflectionMapping
    scene.environment = texture
})

/* 几何体 */
const sphereGeometry = new SphereGeometry(1, 36, 36)
/* 材质 */
const mat = new MeshStandardMaterial()

scene.add(new Mesh(sphereGeometry, mat))
效果如下:
当前roughness默认为1,表示完全漫反射。若设置为0,则是完全镜面反射。
/* 材质 */
const mat = new MeshStandardMaterial()
// 光泽度
mat.roughness = 0
效果如下:
现在的球体看前来光滑的塑料。
我们可以设置metalness 金属度使其看起来像金属。
/* 材质 */
const mat = new MeshStandardMaterial()
// 光泽度
mat.roughness = 0
// 金属度
mat.metalness = 1
效果如下:
metalness 默认值为0.0。
非金属材质,如木材或石材,使用0.0,金属使用1.0。
0.0到1.0之间的值可用于生锈金属的外观。
如果还提供了metalnessMap,则两个值相乘。
/* 贴图 */
const textureLoader = new TextureLoader()
const ballMetalnessTexture = textureLoader.load('/textures/ball/metalness.jpg')
// 金属度贴图
mat.metalnessMap = ballMetalnessTexture
ballMetalnessTexture 是一张黑白图:
效果如下:
接下来我们再看一下MeshStandardMaterial 材质的其它属性。
1.bumpMap:凹凸贴图
const ballBumpTexture = textureLoader.load('/textures/ball/bump.jpg')
mat.bumpMap = ballBumpTexture
效果如下:
bumpScale 可以控制凹凸强度,默认为1.
mat.bumpScale = 0.02
效果如下:
2.displacementMap:位移贴图,会影响网格顶点的位置。因此若想出效果,模型需要足够的顶点数。
displacementScale 可以控制位移的强度,默认为1。
const ballDisplacementTexture = textureLoader.load(
    '/textures/ball/displacement.jpg'
)
mat.displacementMap = ballDisplacementTexture
mat.displacementScale = 0.2
ballDisplacementTexture 对应的图像如下:
效果如下:
当前的球体依旧发生了形状上的改变,但是根据效果可以知道,它并没有改变顶点的法线。
我当前尚未找到根据displacementMap 更新顶点的法线的API,或许需要手写算法解决此问题。
3.flatShading:是否平面着色
mat.flatShading = true
效果如下:
4.normalMap:法线贴图,会改物体的变受光照强度,不改变物体形状,其功能与凹凸贴图差不多。
const textureLoader = new TextureLoader()
const ballNormalTexture = textureLoader.load('/textures/ball/normal.jpg')
/* 材质 */
const mat = new MeshStandardMaterial()
// 法线贴图
mat.normalMap = ballNormalTexture
ballNormalTexture对应的贴图如下:
效果如下:
normalScale:可以控制凹凸强度,其值是一个二维向量。
mat.normalScale = new Vector2(0.2, 0.2)
效果如下:
法线贴图通常是在3dsmax之类的建模软件里,把顶点很多的高模投影到顶点较少的低模生成的。
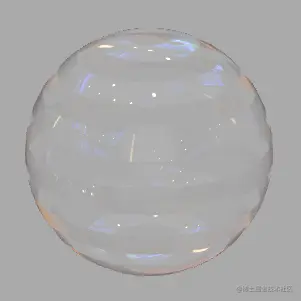
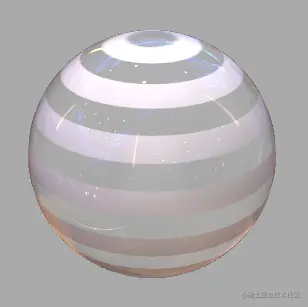
6-MeshPhysicalMaterial
MeshPhysicalMaterial继承自MeshStandardMaterial材质,它提供了更多基于物理的渲染属性:
- Clearcoat:有些类似于车漆,碳纤,被水打湿的表面的材质需要在面上再增加一个透明的,具有一定反光特性的面。而且这个面说不定有一定的起伏与粗糙度。Clearcoat可以在不需要重新创建一个透明的面的情况下做到类似的效果。
- Physically-based transparency:.opacity属性有一些限制,比如在透明度比较高的时候,反射也随之减少。使用基于物理的透光性.transmission属性可以让一些很薄的透明表面,例如玻璃,变得更真实一些。
- Advanced reflectivity: 为非金属材质提供了更多更灵活的光线反射。
- Sheen:可用于布料。
物理网格材质使用了更复杂的着色器功能,所以在每个像素的渲染都要比three.js中的其他材质更费性能,大部分的特性是默认关闭的,需要手动开启,每开启一项功能在开启的时候才会更耗性能。
为获得最佳效果,在使用此材质时需指定environment map。
接下来我们画一个MeshPhysicalMaterial材质的球体。
/* 环境光 */
new RGBELoader().loadAsync('/textures/environment/shop.hdr').then((texture) => {
    texture.mapping = EquirectangularReflectionMapping
    scene.environment = texture
})
/* 几何体 */
const sphereGeometry = new SphereGeometry(1, 36, 36)
/* 材质 */
const mat = new MeshPhysicalMaterial()

scene.add(new Mesh(sphereGeometry, mat))
效果如下:
接下来我们看一下其常见属性。
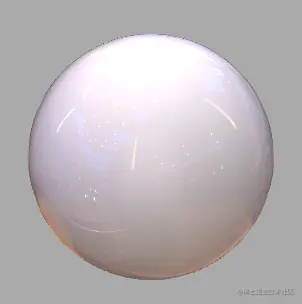
1.clearcoat:透明涂层的强度,从0.0到1.0,默认值为0.0。
mat.clearcoat = 1
效果如下:
这么看有点像MeshStandardMaterial 材质的roughness,实则是不一样的,我们可以对比一下其效果。
给当前的球体一张粗糙的凹凸贴图。
const marbleTexture = textureLoader.load('/textures/stone/marble-01.jpg')
/* 材质 */
const mat = new MeshPhysicalMaterial()
// 透明涂层的强度
mat.clearcoat = 1
// 凹凸
mat.bumpMap = marbleTexture
mat.bumpScale = 0.02
效果如下:
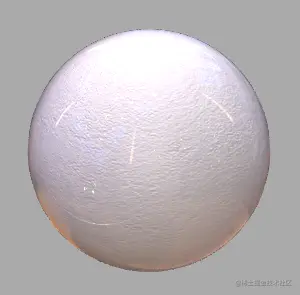
当前的效果就像粗糙的石膏球表面包了一层玻璃壳。
接下来给MeshStandardMaterial 材质一个同样的光泽度和凹凸贴图看看。
/* 材质 */
const mat = new MeshStandardMaterial()
// 光泽度
mat.roughness = 0
// 凹凸贴图
mat.bumpMap = marbleTexture
mat.bumpScale = 0.02
效果如下:
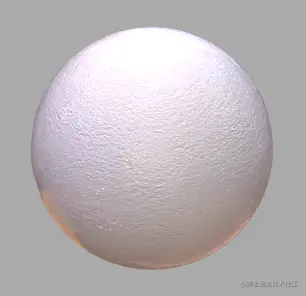
这就像一个有凹凸感的玻璃球。
2.clearcoatMap:透明涂层强度贴图,这个贴图的红色通道值会与.clearcoat相乘作为整个clear coat的强度值层,默认为null。
const stripeTexture = textureLoader.load('/textures/ball/stripe.jpg')
// 透明涂层强度贴图
mat.clearcoatMap = stripeTexture
stripeTexture对应的贴图如下:
效果如下:
当前的球体像是被透明胶带缠绕。
3.clearcoatNormalMap:透明图层法线贴图,默认为null。
const ballNormalTexture = textureLoader.load('/textures/ball/normal.jpg')
mat.clearcoatNormalMap = ballNormalTexture
ballNormalTexture对应的贴图如下:
效果如下:
clearcoatNormalScale:可以设置透明图层法线的强度,由(0,0)到(1,1),默认为(1,1)。
mat.clearcoatNormalScale = new Vector2(0.5, 0.5)
效果如下:
4.clearcoatRoughness:透明涂层的粗糙度,从0.0到1.0。默认值为0.0。
/* 材质 */
const mat = new MeshPhysicalMaterial()
// 透明涂层的强度
mat.clearcoat = 1
// 凹凸
mat.bumpMap = marbleTexture
mat.bumpScale = 0.02
// 透明涂层的粗糙度
mat.clearcoatRoughness = 1
效果如下:
5.sheenColor:辉光颜色,与sheen 光辉强度搭配使用,视线与着色点法线的夹角越大,辉光越明显,适合制作布料或毛绒效果。
sheen 光辉强度,从0.0到1.0,默认值为0.0。
/* 材质 */
const mat = new MeshPhysicalMaterial()
// 凹凸
mat.bumpMap = marbleTexture
mat.bumpScale = 0.02
// 颜色
mat.color = new Color('red')
// 辉光颜色
mat.sheenColor = new Color('yellow')
// 辉光强度
mat.sheen = 1
效果 如下:
由上图可见,模型的边缘是偏黄的,这就是辉光效果。
sheenColor也可以用贴图表示,通过sheenColorMap 属性设置。
6.sheenRoughness:辉光粗糙度,由0.0到1.0。默认值是1.0。
mat.sheenRoughness = 0
效果如下:
球体边缘有了一个金色描边。
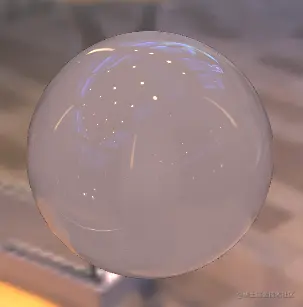
7.transmission:透射度(或光学透明度),从0.0到1.0。默认值为0.0。
可以让物体即使完全透明,也有较强的反射。适用于比较薄的、透明或半透明的材质,比如玻璃、塑料。
当透射为非零时,不透明度应设置为0。
/* 材质 */
const mat = new MeshPhysicalMaterial()
// 透明涂层的强度
mat.clearcoat = 1
// 透射度
mat.transmission = 1
mat.opacity = 0
我们也可以给它一个透明度贴图看下效果:
/* 材质 */
const mat = new MeshPhysicalMaterial()
// 透明涂层的强度
mat.clearcoat = 1
// 透射度
mat.transmission = 1
// 使用透明度贴图
mat.transparent = true
mat.side = DoubleSide
mat.alphaMap = alphaTexture
效果如下:
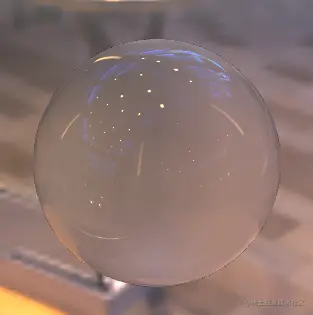
8.transmissionMap:透射率贴图,此纹理的红色通道会与透光性.transmission相乘最为最终的透光性结果。默认为null。
/* 材质 */
const mat = new MeshPhysicalMaterial()
// 透明涂层的强度
mat.clearcoat = 1
// 透射度
mat.transmission = 1
mat.opacity = 0
// 透射率贴图
mat.transmissionMap = stripeTexture
效果如下:
9.ior(index-of-refraction):非金属材质折射率,范围由1.0到2.333。默认为1.5。
为方便观察,给场景一个background背景。
new RGBELoader().loadAsync('/textures/environment/shop.hdr').then((texture) => {
    texture.mapping = EquirectangularReflectionMapping
    scene.environment = texture
    scene.background = texture
})
/* 材质 */
const mat = new MeshPhysicalMaterial()
// 透明涂层的强度
mat.clearcoat = 1
// 透射度
mat.transmission = 1
mat.opacity = 0
// 非金属材质折射率
mat.ior = 1.5
效果如下:
当前的球是一个玻璃球,因为玻璃的折射率就是1.5。
冰的折射率是1.3
mat.ior = 1.3
效果如下:
10.reflectivity:反射率,由0.0到1.0,默认0.5,相当于index-of-refraction 的1.5,它模拟了非金属材质的反射率。当metalness为1.0时,此属性无效。
reflectivity和ior 的功能差不多,只是定义域不一样。
/* 材质 */
const mat = new MeshPhysicalMaterial()
// 透明涂层的强度
mat.clearcoat = 1
// 透射度
mat.transmission = 1
mat.opacity = 0
// 非金属材质折射率
mat.ior = 1.5
//反射率
mat.reflectivity = 0.3
效果如下:
11.specularIntensity :高光强度,漫反射材质对应的值为0。范围从0.0到1.0。 默认值为0.0。
/* 材质 */
const mat = new MeshPhysicalMaterial()
// 透明涂层的强度
mat.clearcoat = 1
// 高光强度
mat.specularIntensity = 10
// 高光颜色
mat.specularColor = new Color('red')
我当前给了一个比较高的高光强度,效果如下:
现在整个球体的颜色偏向了specularColor。
specularIntensityMap 可以给高光强度一个贴图,此纹理的alpha通道将与specularColor相乘,用于逐像素地控制高光颜色。默认值为null。这个用得不算多,我们便不再举例。
关于MeshPhysicalMaterial 材质的常见属性我们就说到这,接下来我们看一看其它材质。
7-MeshToonMaterial
MeshToonMaterial 卡通材质,可以制作卡通效果。
MeshToonMaterial具备MeshLambertMaterial材质所有属性,所以我们后面只说MeshToonMaterial 材质的特有属性。
MeshToonMaterial会用固定的几个颜色着色,从而使其着色效果看起来不是那么平滑。
/* 几何体 */
const sphereGeometry = new SphereGeometry(1, 36, 36)

/* 材质 */
const mat = new MeshToonMaterial()

scene.add(new Mesh(sphereGeometry, mat))

/* 灯光 */
const light = new DirectionalLight(0xffffff, 0.5)
light.position.set(10, 10, 10)
scene.add(light)
效果如下:
我们可以通过gradientMap 属性定义渐变贴图,这里的渐变贴图可以理解为一个亮度集合。
const format = renderer.capabilities.isWebGL2 ? RedFormat : LuminanceFormat
const colors = new Uint8Array(3)
for (let c = 0; c <= colors.length; c++) {
    colors[c] = (c / colors.length) * 256
}
const gradientMap = new DataTexture(colors, colors.length, 1, format)
gradientMap.needsUpdate = true
效果如下:
colors中有三个值[0, 85, 170],对应了上图的三种亮度,其值域是[0,255]。
DataTexture() 中的四个参数如下:
- data:数据源,必须是一个 ArrayBufferView
- width, height:数据宽高
- format:数据格式,WebGL2是THREE.RedFormat,否则是THREE.LuminanceFormat
gradientMap.needsUpdate 是纹理更新属性,当纹理发生改变时,需要手动设置needsUpdate 为true。
MeshToonMaterial 材质的颜色还是用color设置。
/* 材质 */
const mat = new MeshToonMaterial()
// 渐变贴图
mat.gradientMap = gradientMap
// 颜色
mat.color.set(0x00acec)
效果如下:
8-ShadowMaterial
ShadowMaterial 阴影材质,这种材料可以接收阴影,但在其他方面是完全透明的。可以用于获取创建阴影的数据。
其用法如下:
/* 快速初始化项目 */
const stage = new Stage(0, 3, 6)
const { scene, renderer, camera } = stage
renderer.shadowMap.enabled = true
renderer.setClearColor(0xaaaaaa)
camera.lookAt(0, 1, 0)

/* 环境光 */
new RGBELoader().loadAsync('/textures/environment/shop.hdr').then((texture) => {
    texture.mapping = EquirectangularReflectionMapping
    scene.environment = texture
})

/* 球体 */
{
    const geometry = new SphereGeometry(1, 36, 36)
    const material = new MeshStandardMaterial()
    // 光泽度
    material.roughness = 0.2
    material.metalness = 1
    const mesh = new Mesh(geometry, material)
    mesh.position.set(0, 1, 0)
    mesh.castShadow = true
    scene.add(mesh)
}

/* 平面 */
{
    const geometry = new PlaneGeometry(2000, 2000)
    geometry.rotateX(-Math.PI / 2)
    const material = new ShadowMaterial()
    const plane = new Mesh(geometry, material)
    plane.receiveShadow = true
    scene.add(plane)
}

/* 灯光 */
{
    const light = new DirectionalLight(0xffffff, 0.1)
    light.position.set(10, 10, 10)
    light.castShadow = true
    scene.add(light)
}
效果如下:
通过上面的代码可以知道,要使用阴影材质,要具备以下条件:
- 开启渲染对象的shadowMap属性。
- 需要有物体castShadow。
- 需要有灯光照射物体,并castShadow。
- ShadowMaterial材质的物体需要receiveShadow。
9-MeshDepthMaterial
MeshDepthMaterial 深度材质,按深度渲染物体。深度是相对于相机远近平面而言的。白色最近,黑色最远。
其用法如下:
/* 快速初始化项目 */
const stage = new Stage(0, 2, 6)
const { scene, renderer, camera } = stage
renderer.setClearColor(0xaaaaaa)
camera.near = 3
camera.far = 20
camera.lookAt(0, 1, 0)

/* 球体 */
{
    const geometry = new SphereGeometry(1, 36, 36)
    const material = new MeshDepthMaterial()
    const mesh = new Mesh(geometry, material)
    mesh.position.set(0, 1, 0)
    scene.add(mesh)
}

/* 平面 */
{
    const geometry = new PlaneGeometry(2000, 2000)
    geometry.rotateX(-Math.PI / 2)
    const material = new MeshDepthMaterial()
    const plane = new Mesh(geometry, material)
    scene.add(plane)
}
效果如下:
10-MeshNormalMaterial
MeshNormalMaterial 法线材质,会把几何体的法向量映射到RGB颜色。
这个参者咱们入门时用过,便不再举例,效果如下:
11-PointsMaterial
webgl 可以绘制点、线、面,我们之前说的所有材质都是针对面的。
PointsMaterial 材质是针对点的材质。
其用法如下:
const vertices = []
for (let i = 0; i < 20; i++) {
    const x = MathUtils.randFloatSpread(2)
    const y = MathUtils.randFloatSpread(2)
    const z = MathUtils.randFloatSpread(10)
    vertices.push(x, y, z)
}
const geometry = new BufferGeometry()
geometry.setAttribute('position', new Float32BufferAttribute(vertices, 3))
const material = new PointsMaterial({
    color: 0x00acec,
    transparent: true,
    opacity: 0.5,
})
const points = new Points(geometry, material)
scene.add(points)
效果如下:
size 可以控制点的大小,默认为1。
const material = new PointsMaterial({
    ……
    size: 2,
})
效果如下:
默认点的大小是随透视相机的近大远小而变化的。
sizeAttenuation 可以控制点的尺寸是否受透视相机影响,默认为true。
若sizeAttenuation 为false,size 是以像素为单位的。
const material = new PointsMaterial({
    color: 0x00acec,
    transparent: true,
    opacity: 0.5,
    size: 40,
    sizeAttenuation: false,
})
效果如下:

12-LineBasicMaterial
LineBasicMaterial 线材质,可用于绘制几何体的线框。
其用法如下:
const vertices = [1, 1, 0, -1, 1, 0]
const geometry = new BufferGeometry()
geometry.setAttribute('position', new Float32BufferAttribute(vertices, 3))
const material = new LineBasicMaterial({
    color: 0x00acec,
    linewidth: 20,
})
const points = new Line(geometry, material)
scene.add(points)
效果如下:

受平台影响,LineBasicMaterial虽然有linewidth 属性,但这一般并不好使,只能画出宽度为1的线。
13-LineDashedMaterial
LineDashedMaterial 虚线材质,继承自LineDashedMaterial。
其用法如下:
const vertices = [1, 1, 0, -1, 1, 0, -1, -1, 0, 1, -1, 0]
const geometry = new BufferGeometry()
geometry.setAttribute('position', new Float32BufferAttribute(vertices, 3))
const material = new LineDashedMaterial({
    color: 0xffffff,
    // 实线长度
    dashSize: 0.2,
    // 虚线长度
    gapSize: 0.2,
    // 缩放
    scale: 2,
})
const line = new Line(geometry, material)
// 计算起点到每一个顶点的距离集合
line.computeLineDistances()
// [0,2,4,6]
console.log(geometry.getAttribute('lineDistance'))
效果如下:
通过Line 对象画虚线是,需要先用computeLineDistances() 方法计算出起点到每一个顶点的距离集合。
这个距离集合会存储在attribute类型的lineDistance 变量中。
其实现原理很简单,我们不妨思考一下。
首先,因为lineDistance是attribute类型的数据,所以我们可以在片元着色器里获取当前片元到起点的距离distance。
接下来我们判断当前片元是否需要着色即可:
scss

复制代码mod(distance,dashSize+gapSize)<dashSize
mod(distance,dashSize+gapSize)是基于实线长度和虚线长度的和,对distance进行取余。
取余后,判断一下此值是否小于实线长度,若小于就着色,否则不着色。
14-SpriteMaterial
SpriteMaterial是一种粒子材质,也叫精灵材质,适合开发图像数量较多,且不适合建模的场景。
SpriteMaterial需要与Sprite对象配合使用,用法如下:
/* 粒子材质 */
const material = new SpriteMaterial({ color: 0x00acec })
/* 粒子对象 */
const sprite = new Sprite(material)
scene.add(sprite)
效果如下:

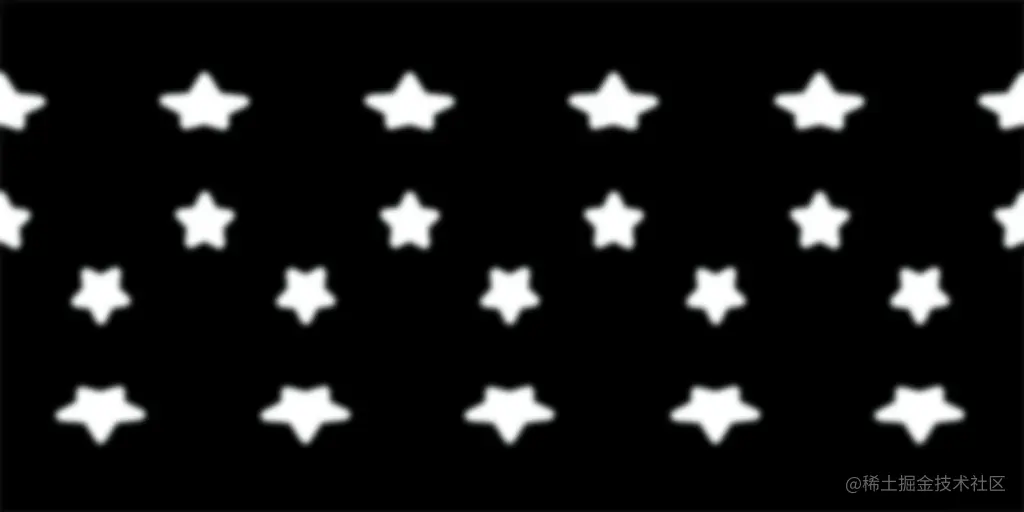
通常我们会给粒子一个贴图:
/* 粒子材质 */
const material = new SpriteMaterial({ color: 0x00acec })
/* 粒子对象 */
const sprite = new Sprite(material)
scene.add(sprite)

/* 加载纹理 */
const textureLoader = new TextureLoader().loadAsync('/textures/snow/snow.png')
textureLoader.then((map) => {
    material.map = map
})
效果如下:
说一下SpriteMaterial 的常见属性。
transparent:是否开始其透明度,默认为ture。
rotation:旋转贴图。
stage.beforeRender = (time = 0) => {
    material.rotation = time * 0.003
}
效果如下:
sizeAttenuation :粒子的大小是否随深度变化,与PointsMaterial 的sizeAttenuation 同理,默认为true。
stage.beforeRender = (time = 0) => {
    /* 旋转动画 */
    material.rotation = time * 0.003
    /* sizeAttenuation测试 */
    sprite.position.z = Math.sin(time * 0.003) * 4
}
效果如下:
我们理解了这一个例子之后,就可以可以拷贝无数个。
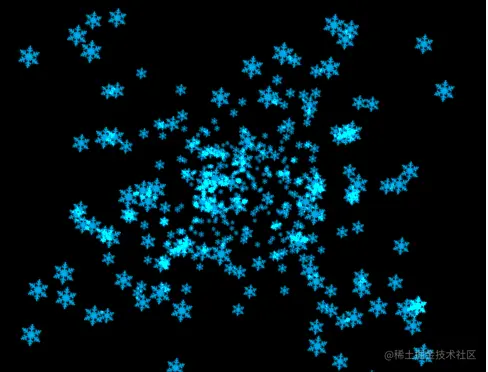
来一场子夜的雪:
/* 快速初始化项目 */
const stage = new Stage(0, 0, 40)
const { scene, renderer, camera } = stage

const material = new SpriteMaterial({
    color: 0x00acec,
    blending: AdditiveBlending,
})

/* 粒子集合 */
const group = new Group()
scene.add(group)
for (let i = 0; i < 400; i++) {
    /* 粒子对象 */
    const sprite = new Sprite(material)
    sprite.position.x = randFloatSpread(20)
    sprite.position.y = randFloatSpread(20)
    group.add(sprite)
}

/* 加载纹理 */
const textureLoader = new TextureLoader().loadAsync('/textures/snow/snow.png')
textureLoader.then((map) => {
    material.map = map
})

/* 动画 */
stage.beforeRender = (time = 0) => {
    material.rotation = time * 0.003
    group.children.forEach((sprite, ind) => {
        sprite.position.z = Math.sin(time * 0.002 - ind * 0.1) * 40 - 20
    })
}
效果如下:
在上面的材质里,我们还用blending做了一个亮色的颜色合成,这个我们后面会说。
15-Material 对象
Material 对象是上面所说的所有材质的基类,所以其中的属性和方法在所有材质里都是公用的。
15-1-alpha相关的属性
1.alphaTest:设置运行alphaTest时要使用的alpha值。如果不透明度低于此值,则不会渲染材质。默认值为0。
比如画一个半透明的粒子。
const material = new SpriteMaterial({
    color: 0x00acec,
    opacity: 0.5,
})
/* 粒子对象 */
const sprite = new Sprite(material)
scene.add(sprite)
效果如下:

若让alphaTest低于opacity,那这个粒子就不可见了。
const material = new SpriteMaterial({
    color: 0x00acec,
    opacity: 0.5,
    alphaTest: 0.6,
})
2.alphaToCoverage:启用alpha to coverage. 只能在开启了MSAA的渲染环境中使用 (当渲染器创建的时候antialias 属性要true才能使用), 默认为 false。
alphaToCoverage是在MSAA基础上的一种优化,可以让透明纹理的边界更加柔和。
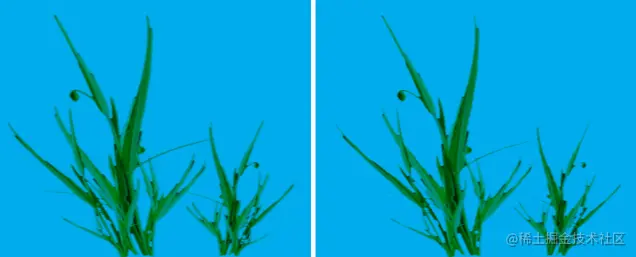
不只大家能否看出左右两幅图的差异,右侧是开了alphaToCoverage的,边界更平滑。其差异并不算太大,所以若非必要,可以不用开。
使用alphaToCoverage时,需要开启antialias。
new WebGLRenderer({ antialias: true })
接下来正常绘图即可:
const material = new SpriteMaterial({
    color: 0x00acec,
    // opacity: 0.5,
    // alphaTest: 0.6,
    alphaToCoverage: true,
})
const textureLoader = new TextureLoader()
const grassDiffLoader = textureLoader.loadAsync(
    '/textures/grass/grass-diff.jpg'
)
const grassMaskLoader = textureLoader.loadAsync(
    '/textures/grass/grass-mask.jpg'
)
Promise.all([grassDiffLoader, grassMaskLoader]).then((textures) => {
    material.map = textures[0]
    material.alphaMap = textures[1]
})
15-2-blend相关的属性
若不知底层原理,three.js中blend相关的属性会很难理解。
所以大家若不知webgl中blend,那就需要先看一下我的这篇文章《WebGL颜色合成》。
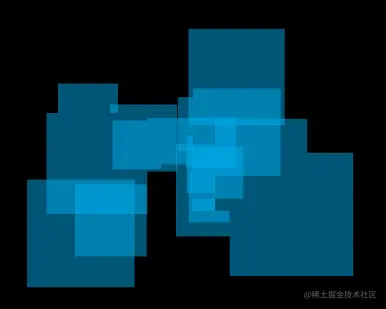
blending:颜色合成方式,默认是NormalBlending
three.js 提供了以下颜色合成方式:
- THREE.NoBlending
- THREE.NormalBlending
- THREE.AdditiveBlending
- THREE.SubtractiveBlending
- THREE.MultiplyBlending
- THREE.CustomBlending
其效果如下:
图片来自three.js官网。
如果大家想自定义合成方法,需要将blending 属性设置为CustomBlending。
如果大家理解了webgl中的合成方法,那就会知道这些方法:
- blendFunc(sfactor, dfactor)
- blendFuncSeparate( srcRGB, dstRGB, srcAlpha, dstAlpha)
- blendEquation(mode)
- blendEquationSeparate(modeRGB, modeAlpha)
Material 对象的属性与WebGL中的参数的对应关系如下:
- blendSrc:sfactor或srcRGB
- blendDst: dfactor或dstRGB
- blendSrcAlpha:srcAlpha
- blendDstAlpha:dstAlpha
- blendEquation:mode或modeRGB
- blendEquationAlpha:modeAlpha
通过blend相关的属性,我们可以做很多有趣的效果,比如物体的高亮。
举个例子,比如在三维机房里,有的机柜过热,可以通过blend属性对其高亮预警。
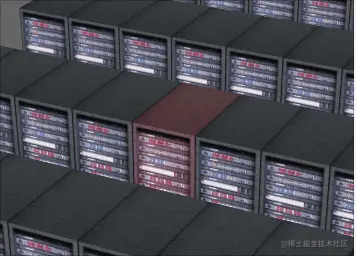
其原理是拷贝一个要预警的机柜,将此机柜的blending设置为AdditiveBlending 高亮模式。
其材质代码如下:
const highlightMat = new MeshBasicMaterial({
    color: 0xff0000,
    opacity: 0.5,
    blending: AdditiveBlending,
    transparent: true,
    polygonOffset: true,
    polygonOffsetFactor: 0,
    polygonOffsetUnits: -1,
})
因为新拷贝的机柜会和原有机柜发生深度冲突,所以需要使用polygonOffset 相关的属性解决此问题。
对应机柜的闪烁动画,可以通过opacity控制:
highlightMat.opacity = (Math.sin(time * 0.005) * 0.5 + 0.5) * 0.4 + 0.1
整体代码如下:
/* 快速初始化项目 */
const stage = new Stage(20, 30, 40)
const { scene, renderer } = stage
renderer.localClippingEnabled = true
renderer.shadowMap.enabled = true
// 背景色
renderer.setClearColor(0x666666)

// 高亮材质
const highlightMat = new MeshBasicMaterial({
    color: 0xff0000,
    opacity: 0,
    blending: AdditiveBlending,
    transparent: true,
    polygonOffset: true,
    polygonOffsetFactor: 0,
    polygonOffsetUnits: -1,
})

const gltfLoader = new GLTFLoader()
gltfLoader.loadAsync('/models/gltf/cabinet.glb').then((model) => {
    init(model.scene.children[0] as Mesh)
})

const row = 2
const col = 4
const rowSize = 2.85
const colSize = 9
function init(mesh: Mesh) {
    const material = mesh.material as MeshStandardMaterial
    const { map } = material
    if (!map) {
        return
    }
    map.encoding = LinearEncoding

    const { geometry } = mesh

    for (let z = -row; z < row; z++) {
        for (let x = -col; x < col; x++) {
            const mesh = new Mesh(
                geometry,
                new MeshBasicMaterial({
                    map,
                })
            )
            mesh.position.x = x * rowSize
            mesh.position.z = z * colSize
            scene.add(mesh)
        }
    }

    /* 高亮材质 */
    const highlightMesh = new Mesh(mesh.geometry, highlightMat)
    scene.add(highlightMesh)
}

/* 预警动画 */
stage.beforeRender = function (time = 0) {
    highlightMat.opacity = (Math.sin(time * 0.005) * 0.5 + 0.5) * 0.4 + 0.1
}
15-3-裁剪相关的属性
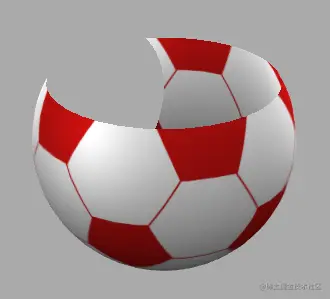
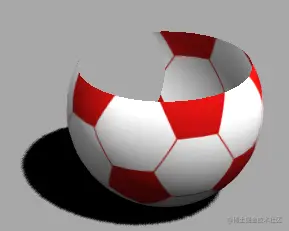
1.clippingPlanes:Plane对象集合,默认值为null。在片元着色器中,会基于片元到这些平面的有向距离(signed distance)来确定当前片元要不要着色,从而实现裁剪效果。此功能需要WebGLRenderer.localClippingEnabled 为true。
代码实现如下:
/* 快速初始化项目 */
const stage = new Stage(0, 3, 6)
const { scene, renderer } = stage
renderer.setClearColor(0xaaaaaa)
renderer.localClippingEnabled = true

/* 贴图 */
const textureLoader = new TextureLoader()
const ballColorTexture = textureLoader.load('/textures/ball/color.jpg')
const lightTexture = textureLoader.load('/textures/ball/light.jpg')
const shopTexture = textureLoader.load('/textures/environment/shop.jpg')
shopTexture.mapping = EquirectangularReflectionMapping

const plane = new Plane(new Vector3(0, -1, 0), 0.5)
const sphereGeometry = new SphereGeometry(1, 36, 36)
sphereGeometry.setAttribute('uv2', sphereGeometry.attributes.uv)
const mat = new MeshBasicMaterial({
    map: ballColorTexture,
    lightMap: lightTexture,
    lightMapIntensity: 1.3,
    side: DoubleSide,
    clippingPlanes: [plane],
})

scene.add(new Mesh(sphereGeometry, mat))
效果如下:
我们可以建立多个裁剪平面:
const clippingPlanes = [
    new Plane(new Vector3(0, -1, 0), 0.5),
    new Plane(new Vector3(1, 0, 1), 0.5),
]
const sphereGeometry = new SphereGeometry(1, 36, 36)
sphereGeometry.setAttribute('uv2', sphereGeometry.attributes.uv)
const mat = new MeshBasicMaterial({
    map: ballColorTexture,
    lightMap: lightTexture,
    lightMapIntensity: 1.3,
    side: DoubleSide,
    clippingPlanes,
})
效果如下:
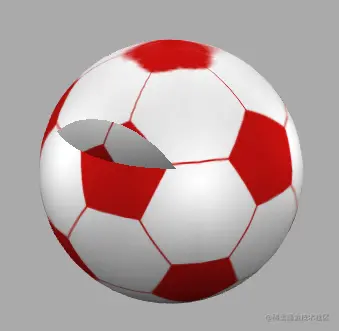
2.clipIntersection:翻转裁剪方向,默认值为false。
const clippingPlanes = [
    new Plane(new Vector3(0, -1, 0), 0.5),
    new Plane(new Vector3(1, 0, 1), 0.5),
]
const sphereGeometry = new SphereGeometry(1, 36, 36)
sphereGeometry.setAttribute('uv2', sphereGeometry.attributes.uv)
const mat = new MeshBasicMaterial({
    map: ballColorTexture,
    lightMap: lightTexture,
    lightMapIntensity: 1.3,
    side: DoubleSide,
    clippingPlanes,
    clipIntersection: true,
})
效果如下:
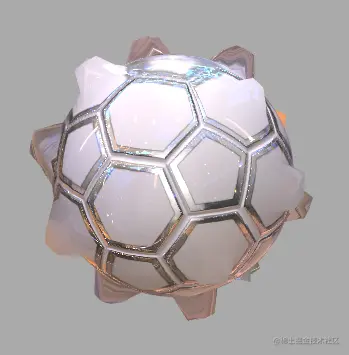
3.clipShadows:是否让物体的投影受裁剪影响,默认值为false。
示例:
/* 快速初始化项目 */
const stage = new Stage(0, 4, 8)
const { scene, renderer } = stage

renderer.setClearColor(0xaaaaaa)
renderer.localClippingEnabled = true
renderer.shadowMap.enabled = true

/* 贴图 */
const textureLoader = new TextureLoader()
const ballColorTexture = textureLoader.load('/textures/ball/color.jpg')
const lightTexture = textureLoader.load('/textures/ball/light.jpg')
const shopTexture = textureLoader.load('/textures/environment/shop.jpg')
shopTexture.mapping = EquirectangularReflectionMapping

/* 球体 */
const clippingPlanes = [
    new Plane(new Vector3(0, -1, 0), 0.5),
    new Plane(new Vector3(1, 0, 1), 0.5),
]
const sphereGeometry = new SphereGeometry(1, 36, 36)
sphereGeometry.setAttribute('uv2', sphereGeometry.attributes.uv)
const mat = new MeshLambertMaterial({
    map: ballColorTexture,
    lightMap: lightTexture,
    lightMapIntensity: 0.8,
    side: DoubleSide,
    clippingPlanes,
    // clipIntersection: true,
})
const sphere = new Mesh(sphereGeometry, mat)
sphere.castShadow = true

scene.add(sphere)

/* 地面 */
{
    const geometry = new PlaneGeometry(2000, 2000)
    geometry.rotateX(-Math.PI / 2)
    const material = new MeshLambertMaterial({
        color: 0xffffff,
    })
    const plane = new Mesh(geometry, material)
    plane.receiveShadow = true
    plane.position.y = -1
    scene.add(plane)
}

/* 灯光 */
{
    const light = new DirectionalLight(0xffffff, 0.8)
    light.position.set(5, 10, 5)
    light.castShadow = true
    scene.add(light)
}
默认对物体的裁剪不影响投影:
将clipShadows设置为true:
const mat = new MeshLambertMaterial({
    map: ballColorTexture,
    lightMap: lightTexture,
    lightMapIntensity: 0.8,
    side: DoubleSide,
    clippingPlanes,
    // clipIntersection: true,
    clipShadows: true,
})
效果如下:

15-4-深度相关
1.depthFunc:要使用的深度测试函数。默认值为LessEqualDepth。
depthFunc 是将当前着色点的深度与深度缓冲区内的深度信息进行比较的方法。若比较结果为真,即通过深度测试。
depthFunc 可以取以下值:
- NeverDepth永远不会返回true。
- AlwaysDepth将始终返回true。
- EqualDepth如果传入像素Z深度等于当前缓冲区Z深度,则EqualDepth将返回true。
- LessDepth如果传入像素Z深度小于当前缓冲区Z深度,LessDepth将返回true。
- LessEqualDepth是默认值,如果传入像素Z深度小于或等于当前缓冲区Z深度,则返回true。
- GreaterEqualDepth 如果传入像素Z深度大于或等于当前缓冲区Z深度,GreaterEqualDepth将返回true。
- GreaterDepth 如果传入像素Z深度大于当前缓冲区Z深度,GreaterDepth将返回true。
- GreaterDepth 如果传入像素Z深度不等于当前缓冲区Z深度,则NotEqualDepth将返回true。
2.depthTest 渲染此材质时是否启用深度测试。默认值为true。
3.depthWrite 渲染此材质是否会对深度缓冲区产生任何影响。默认值为true。
4.forceSinglePass 无论是 double-sided双面材质还是transparent 透明材质,都只渲染一次,默认值为false。
当材质为double-sided或transparent 时,three.js 默认会先渲染背面,再渲染正面,以此让渲染效果更接近真实。然而,这种方法没必要使用,比如渲染一大片植被的时候。这时将forceSinglePass设置为true,以禁用两次渲染,从而提高渲染速度。
有的时候,我们希望物体不被遮挡,比如TransformControls控制器。
其材质是这样设置的:
const gizmoMaterial = new MeshBasicMaterial( {
    //取消深度测试
    depthTest: false,
    //取消深度写入
    depthWrite: false,
    //不受无效影响
    fog: false,
    //取消色调映射
    toneMapped: false,
    //开启透明度
    transparent: true
} );
15-5-深度冲突相关
polygonOffset 是否使用多边形偏移。默认值为false。这与GL_POLYGON_OFFSET_FILL WebGL功能相对应。
polygonOffsetFactor 设置多边形偏移因子。默认值为0。
polygonOffsetUnits 设置多边形偏移单位。默认值为0。
我们之前在通过blend属性对机柜进行高亮预警时举过这个例子。

在上图中红色的预警的柜子模型是和原有的柜子模型重叠的,所以需要解决深度冲突:
const highlightMat = new MeshBasicMaterial({
    color: 0xff0000,
    opacity: 0.5,
    blending: AdditiveBlending,
    transparent: true,
    polygonOffset: true,
    polygonOffsetFactor: 0,
    polygonOffsetUnits: -1,
})
15-6-模板缓冲区相关的属性
若不知底层原理,three.js中stencil相关的属性会很难理解。
所以大家若不知webgl中stencil,那就需要先看一下我的这篇文章《WebGL模板缓冲区》。
stencilWrite:是否对模板缓冲区进行模板写入操作,默认值为false。若要对模板缓冲区进行写入或比较,此值必须为true。
如果大家理解了webgl中的stencil方法,那就会知道这些方法:
- stencilFunc(func, ref, mask) 设置模板测试函数、参考值和掩码。
- stencilOp(fail, zfail, zpass):指定通过测试和未通过测试时要怎么处理。
Material 对象中stencil相关的属性与WebGL中的参数的对应关系如下:
- stencilFunc :对应func,模板比较函数,可取以下值:
- THREE.NeverStencilFunc
- THREE.LessStencilFunc
- THREE.EqualStencilFunc
- THREE.LessEqualStencilFunc
- THREE.GreaterStencilFunc
- THREE.NotEqualStencilFunc
- THREE.GreaterEqualStencilFunc
- THREE.AlwaysStencilFunc
- stencilRef:对应ref,模板比较或模板操作时要使用的参考值,默认值为0。
- stencilFuncMask :对应mask,与模板缓冲区进行比较时要使用的位掩码,默认值为0xFF。
- stencilFail:对应fail,模板测试失败时要执行的操作,默认值为KeepStencilOp,可取以下值:
- THREE.ZeroStencilOp
- THREE.KeepStencilOp
- THREE.ReplaceStencilOp
- THREE.IncrementStencilOp
- THREE.DecrementStencilOp
- THREE.IncrementWrapStencilOp
- THREE.DecrementWrapStencilOp
- THREE.InvertStencilOp
- stencilZFail:对应zfail,深度测试失败时要执行的操作,默认值为KeepStencilOp,取值同上。
- stencilZPass:对应stencilZPass,模板测试和深度测试成功时要执行的操作,默认值为KeepStencilOp,取值同上。
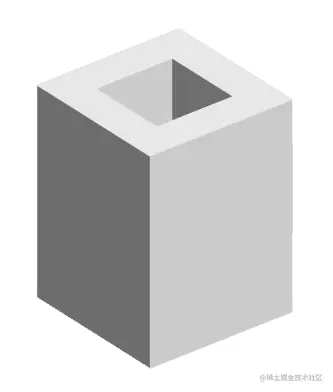
接下来我们举个例子,对一栋楼房进行剖面。
我们先假设这栋楼房是一个中空的盒子,我们要对其进行水平剖面,剖面高度可以自定义,效果如下所示。
其剖面步骤如下:
1.先用一个水平面把楼房切开,这个方法我们在clippingPlanes中说过。
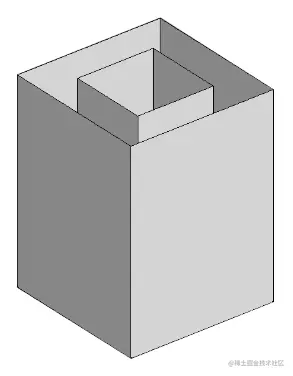
这种裁剪后的模型是没有截面的,所以绘制模型的截面便成了此处的重点。
2.使用模型的背面构建模板缓冲区,模板测试方法为AlwaysStencilFunc 永远通过测试,模板值的写入方式为IncrementStencilOp ,即在当前模板值的基础上+1。
其模板效果如下:
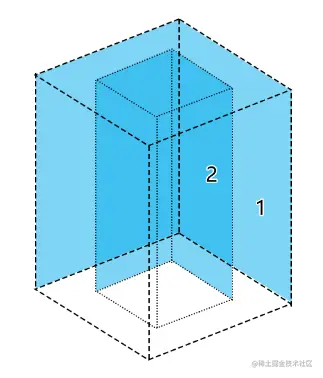
浅蓝色的区域的模板值是1;深蓝色的区域的模板值是2,因为这里2次绘图,2次+1。
3.使用模型的前面修改模板缓冲区,模板测试方法为AlwaysStencilFunc 永远通过测试,模板值的写入方式为DecrementStencilOp ,即在当前模板值的基础上-1。
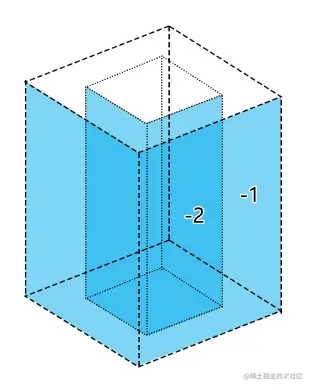
浅蓝色的区域的模板值是-1;深蓝色的区域的模板值是-2。
两次绘制的模板合在一起后的效果如下:
由此可见,截面的区域就是1,所以我们可以基于此区域绘制剖面。
整体代码实现如下:
/* 快速初始化项目 */
const stage = new Stage(20, 20, 20)
const { scene, renderer, controls, camera } = stage
renderer.localClippingEnabled = true
renderer.shadowMap.enabled = true
camera.near = 1
camera.far = 50
controls.target.set(0, 5, 0)
controls.update()
// 背景色
renderer.setClearColor(0xdddddd)

/* 环境光 */
new RGBELoader().loadAsync('/textures/environment/shop.hdr').then((texture) => {
    texture.mapping = EquirectangularReflectionMapping
    scene.environment = texture
})

/*  加载模型 */
const gltfLoader = new GLTFLoader()
const buildPro = gltfLoader.loadAsync('/models/gltf/build.glb')

/* 平面 */
const hp = new Plane(new Vector3(0, -1, 0), 4.9)

/* 平面几何体 */
const planeGeom = new PlaneGeometry(20, 20)

/* 建筑材质 */
const buildMat = new MeshStandardMaterial({
    color: 0xeeeeee,
    roughness: 0.2,
    clippingPlanes: [hp],
    clipShadows: true,
})

/* 模板的基础材质*/
const baseMat = new MeshBasicMaterial()
baseMat.depthWrite = false
baseMat.depthTest = false
baseMat.colorWrite = false
baseMat.stencilWrite = true
baseMat.stencilFunc = AlwaysStencilFunc

/* 背面材质 */
const backMat = baseMat.clone()
backMat.side = BackSide
backMat.clippingPlanes = [hp]
backMat.stencilFail = IncrementWrapStencilOp
backMat.stencilZPass = IncrementWrapStencilOp

/* 正面材质 */
const frontMat = baseMat.clone()
frontMat.side = FrontSide
frontMat.clippingPlanes = [hp]
frontMat.stencilFail = DecrementWrapStencilOp
frontMat.stencilZPass = DecrementWrapStencilOp

/* 截面材质 */
const sectionMat = new MeshStandardMaterial({
    color: 0xe91e63,
    metalness: 0.1,
    roughness: 0.75,
    stencilWrite: true,
    stencilRef: 1,
    stencilFunc: EqualStencilFunc,
})

/* 水平面 */
const hpMesh = new Mesh(planeGeom, sectionMat)
transformObjByPlane(hpMesh, hp)
hpMesh.onAfterRender = function (renderer) {
    renderer.clearStencil()
}

function transformObjByPlane(obj: Object3D, plane: Plane) {
    const { position } = obj
    const { normal } = plane
    plane.coplanarPoint(obj.position)
    obj.lookAt(
        position.x - normal.x,
        position.y - normal.y,
        position.z - normal.z
    )
}

buildPro.then((model) => {
    init(model.scene.children[0] as Mesh)
})

function init(mesh: Mesh) {
    /* 建筑 */
    mesh.material = buildMat
    mesh.castShadow = true
    mesh.receiveShadow = true
    scene.add(mesh)

    /* 建筑几何体 */
    const geometry = mesh.geometry

    /* 背面 */
    const backMesh = new Mesh(geometry, backMat)
    scene.add(backMesh)

    /* 正面 */
    const frontMesh = new Mesh(geometry, frontMat)
    scene.add(frontMesh)

    /* 水平面 */
    scene.add(hpMesh)
}

/* 地面 */
{
    const geometry = new PlaneGeometry(2000, 2000)
    geometry.rotateX(-Math.PI / 2)
    const material = new MeshStandardMaterial({
        color: 0x666666,
        roughness: 1,
    })
    const plane = new Mesh(geometry, material)
    plane.receiveShadow = true
    // plane.position.y = -1
    scene.add(plane)
}

/* 灯光 */
const light = new DirectionalLight(0xffffff, 0.3)
light.position.set(10, 30, 30)
light.castShadow = true
light.shadow.mapSize.width = 1024
light.shadow.mapSize.height = 1024
light.shadow.camera.right = 15
light.shadow.camera.left = -15
light.shadow.camera.top = 15
light.shadow.camera.bottom = -15
light.shadow.camera.near = 1
light.shadow.camera.far = 60
scene.add(light)
效果如下:
解释一下上面的代码。
1.建立辅助平面,之后会用于裁剪模型。
const hp = new Plane(new Vector3(0, -1, 0), 4.9)
2.建立平面的几何体,之后用于画截面。
const planeGeom = new PlaneGeometry(20, 20)
3.建立建筑材质,,此材质会应用水平裁剪面。
const buildMat = new MeshStandardMaterial({
    color: 0xeeeeee,
    roughness: 0.2,
    clippingPlanes: [hp],
    clipShadows: true,
})
4.建立建筑的背面材质和正面材质,背面材质+1,正面材质-1。
/* 模板的基础材质*/
const baseMat = new MeshBasicMaterial()
baseMat.depthWrite = false
baseMat.depthTest = false
baseMat.colorWrite = false
baseMat.stencilWrite = true
baseMat.stencilFunc = AlwaysStencilFunc

/* 背面材质 */
const backMat = baseMat.clone()
backMat.side = BackSide
backMat.clippingPlanes = [hp]
backMat.stencilFail = IncrementWrapStencilOp
backMat.stencilZPass = IncrementWrapStencilOp

/* 正面材质 */
const frontMat = baseMat.clone()
frontMat.side = FrontSide
frontMat.clippingPlanes = [hp]
frontMat.stencilFail = DecrementWrapStencilOp
frontMat.stencilZPass = DecrementWrapStencilOp
5.建立截面材质,此材质会受到模板缓冲区中1的区域过滤。
const sectionMat = new MeshStandardMaterial({
    color: 0xe91e63,
    metalness: 0.1,
    roughness: 0.75,
    stencilWrite: true,
    stencilRef: 1,
    stencilFunc: EqualStencilFunc,
})
6.根据水平面创建一个与其共面的平面模型。
const hpMesh = new Mesh(planeGeom, sectionMat)
transformObjByPlane(hpMesh, hp)
hpMesh.onAfterRender = function (renderer) {
    renderer.clearStencil()
}
function transformObjByPlane(obj: Object3D, plane: Plane) {
    const { position } = obj
    const { normal } = plane
    plane.coplanarPoint(obj.position)
    obj.lookAt(
        position.x - normal.x,
        position.y - normal.y,
        position.z - normal.z
    )
}
因为此模型是最后应用模板缓冲区的,所以它在画完后要清理模板缓冲区。
transformObjByPlane()可以让一个物体的位置在平面plane上,并朝向与法线相反的方向。
7.当模型加载完成后,绘制建筑和截面。
function init(mesh: Mesh) {
    /* 建筑 */
    mesh.material = buildMat
    mesh.castShadow = true
    mesh.receiveShadow = true
    scene.add(mesh)

    /* 建筑几何体 */
    const geometry = mesh.geometry

    /* 背面 */
    const backMesh = new Mesh(geometry, backMat)
    scene.add(backMesh)

    /* 正面 */
    const frontMesh = new Mesh(geometry, frontMat)
    scene.add(frontMesh)

    /* 水平面 */
    scene.add(hpMesh)
}
关于将物体剖面的基本原理就是这样,以此原理我们还可以对物体进行多个方向上的剖面。
其整体代码如下:
/* 快速初始化项目 */
const stage = new Stage(20, 20, 20)
const { scene, renderer, controls, camera } = stage
renderer.localClippingEnabled = true
renderer.shadowMap.enabled = true
camera.near = 1
camera.far = 50
controls.target.set(0, 5, 0)
controls.update()
// 背景色
renderer.setClearColor(0xdddddd)

/* 环境光 */
new RGBELoader().loadAsync('/textures/environment/shop.hdr').then((texture) => {
    texture.mapping = EquirectangularReflectionMapping
    scene.environment = texture
})

/*  加载模型 */
const gltfLoader = new GLTFLoader()
gltfLoader.loadAsync('/models/gltf/build.glb').then((model) => {
    init(model.scene.children[0] as Mesh)
})

/* 模板的基础材质 */
const baseMat = new MeshBasicMaterial()
baseMat.depthWrite = false
baseMat.depthTest = false
baseMat.colorWrite = false
baseMat.stencilWrite = true
baseMat.stencilFunc = AlwaysStencilFunc

/* 3个平面 */
const planes = [
    new Plane(new Vector3(-1, 0, 0), 3),
    new Plane(new Vector3(0, -1, 0), 4.9),
    new Plane(new Vector3(0, 0, -1), 4),
]

/* 3种颜色 */
const colors = [0xe91e63, 0x1ea9e9, 0x1ee987]

/* 平面几何体 */
const planeGeom = new PlaneGeometry(20, 20)

/* 建筑材质 */
const buildMat = new MeshStandardMaterial({
    color: 0xeeeeee,
    roughness: 0.2,
    clippingPlanes: planes,
    clipShadows: true,
})


/* 建立截面 */
function createSection(plane: Plane, geometry: BufferGeometry, ind: number) {
    /* 背面材质 */
    const backMat = baseMat.clone()
    backMat.side = BackSide
    backMat.clippingPlanes = [plane]
    backMat.stencilFail = IncrementWrapStencilOp
    backMat.stencilZPass = IncrementWrapStencilOp
    const backMesh = new Mesh(geometry, backMat)
    scene.add(backMesh)

    /* 正面材质 */
    const frontMat = baseMat.clone()
    frontMat.side = FrontSide
    frontMat.clippingPlanes = [plane]
    frontMat.stencilFail = DecrementWrapStencilOp
    frontMat.stencilZPass = DecrementWrapStencilOp
    const frontMesh = new Mesh(geometry, frontMat)
    scene.add(frontMesh)

    /* 截面材质 */
    const sectionMat = new MeshStandardMaterial({
        color: colors[ind],
        metalness: 0.1,
        roughness: 0.75,
        stencilWrite: true,
        stencilRef: 1,
        stencilFunc: EqualStencilFunc,
        clippingPlanes: planes.filter((p) => p !== plane),
    })
    const sectionMesh = new Mesh(planeGeom, sectionMat)
    transformObjByPlane(sectionMesh, plane)
    sectionMesh.onAfterRender = function (renderer) {
        renderer.clearStencil()
    }
    scene.add(sectionMesh)
}

function transformObjByPlane(obj: Object3D, plane: Plane) {
    const { position } = obj
    const { normal } = plane
    plane.coplanarPoint(obj.position)
    obj.lookAt(
        position.x - normal.x,
        position.y - normal.y,
        position.z - normal.z
    )
}

function init(mesh: Mesh) {
    /* 建筑 */
    mesh.material = buildMat
    mesh.castShadow = true
    mesh.receiveShadow = true
    scene.add(mesh)

    /* 截面 */
    planes.forEach((plane, ind) => {
        createSection(plane, mesh.geometry, ind)
    })
}

/* 地面 */
{
    const geometry = new PlaneGeometry(2000, 2000)
    geometry.rotateX(-Math.PI / 2)
    const material = new MeshStandardMaterial({
        color: 0x666666,
        roughness: 1,
    })
    const plane = new Mesh(geometry, material)
    plane.receiveShadow = true
    // plane.position.y = -1
    scene.add(plane)
}

/* 灯光 */
const light = new DirectionalLight(0xffffff, 0.3)
light.position.set(10, 30, 30)
light.castShadow = true
light.shadow.mapSize.width = 1024 // default
light.shadow.mapSize.height = 1024 // default
light.shadow.camera.right = 15
light.shadow.camera.left = -15
light.shadow.camera.top = 15
light.shadow.camera.bottom = -15
light.shadow.camera.near = 1 // default
light.shadow.camera.far = 60 // default
scene.add(light)
15-7-其它属性
colorWrite:是否渲染材质的颜色。它可以与Mesh对象的renderOrder 特性一起使用,以创建遮挡其他对象的不可见对象。默认值为true。
举一个colorWrite比较有用的例子。
投影的渲染是很消耗性能的,若你的灯光不会频繁变换,那你完全可以先把投影渲染出来,然后贴到会接收到投影的物体上。
当然,这只是个思路,其具体实现还需要一些复杂的操作,我以后再写。
只渲染阴影的方法如下:
/* 快速初始化项目 */
const stage = new Stage(0, 10, 20)
const { scene, renderer } = stage
renderer.shadowMap.enabled = true
renderer.setClearColor(0xffffff)

/* 球体 */
{
    const geometry = new SphereGeometry(1, 36, 36)
    const material = new MeshLambertMaterial({
        colorWrite: false,
    })
    const mesh = new Mesh(geometry, material)
    mesh.position.set(0, 1, 0)
    mesh.castShadow = true
    scene.add(mesh)
}

/* 平面-接收阴影 */
{
    const geometry = new PlaneGeometry(2000, 2000)
    geometry.rotateX(-Math.PI / 2)
    const material = new ShadowMaterial()
    const plane = new Mesh(geometry, material)
    plane.receiveShadow = true
    scene.add(plane)
}

/* 灯光 */
{
    const light = new DirectionalLight(0xffffff, 1)
    light.position.set(10, 10, 10)
    light.castShadow = true
    scene.add(light)
}
效果如下:
defines:要注入到着色器中的自定义数据,以键值对的形式定义,如{PI2:Math.PI*2},默认undefined。
之后在顶点着色器和片段着色器中都会以#define 方式写入这些数据。
关于defines的用法我会在自定义着色器中说。
id :材质的唯一编号。
name:材质名称,不唯一,默认null。
needsUpdate:是否需要重新编译材质。
opacity:材质的透明度,0.0到1.0之,0.0表示完全透明,1.0表示完全不透明,默认值为1.0。
如果材质的 transparent 属性未设置为true,则材质将保持完全不透明,并且该值只会影响其颜色。
precision :片元着色器的精度,可以是highp,mediump,lowp。默认为null。
premultipliedAlpha:是否对alpha或transparency值进行预乘。默认值为false。
dithering:是否对颜色应用抖动以去除条纹的外观。默认值为false。
shadowSide:定义面的哪一侧投射阴影,可以是THRE.FronSide、THRE.BackSide或THRE.DoubleSide。默认值为null。
如果为null,则按如下方式确定侧面投射阴影:
| Material.side | Side casting shadows |
|---|---|
| THREE.FrontSide | back side |
| THREE.BackSide | front side |
| THREE.DoubleSide | both sides |
side:渲染面的哪一侧(正面、背面或两者兼有)。默认为THRE.FronSide。其他选项为THRE.BackSide或THRE.DoubleSide。
toneMapped:此材质是否根据渲染器的色调映射设置进行色调映射。默认值为true。
transparent:定义此材质是否透明。这对渲染有影响,因为透明对象需要特殊处理,并且在不透明对象之后进行渲染。当设置为true时,材质的透明程度由设置其不透明度属性来控制。默认值为false。
type:值为字符串“Material”,不可写,可以用于在场景中查找此类型的所有对象。
uuid:随机生成的唯一id,自动分配的,不可写。
version:needsUpdate设置为true的次数。
vertexColors:是否使用顶点着色,默认值为false。引擎支持RGB和RGBA顶点颜色,具体取决于名称为color的attribute变量使用的是RGB还是RGBA。
代码示例:
/* 顶点 */
const vertices = new Float32Array([0, 1, 0, -1, -1, 0, 1, -1, 0])
/* 颜色 */
const colors = new Float32Array([0, 1, 0, 1, 1, 0, 1, -1, 0])
/* 自定义几何体 */
const geo = new BufferGeometry()
geo.setAttribute('position', new BufferAttribute(vertices, 3))
geo.setAttribute('color', new BufferAttribute(colors, 3))
/* 材质-顶点着色 */
const mat = new MeshBasicMaterial({
    color: 0xffffff,
    vertexColors: true,
})
const mesh = new Mesh(geo, mat)
scene.add(mesh)
效果如下:
color是three内置的attribute变量名,不能随便写。
visible:定义此材质是否可见,默认true。
材质的visible可见性和Mesh对象的visible可见性是不一样的,比如一个材质可能被多个Mesh引用。
userData:用于存储有关材质的自定义数据的对象。它不应该包含对函数的引用,因为这些函数不会被克隆。
15-8-Material对象的方法
clone( ) :克隆材质,比如有些材质属性共用,那就可以基于公共属性建立一个材质,以用于其他材质的克隆。比如咱们之前建立模板材质时就用到了此方法:
/* 模板的基础材质*/
const baseMat = new MeshBasicMaterial()
baseMat.depthWrite = false
baseMat.depthTest = false
baseMat.colorWrite = false
baseMat.stencilWrite = true
baseMat.stencilFunc = AlwaysStencilFunc

/* 背面材质 */
const backMat = baseMat.clone()
backMat.side = BackSide
backMat.clippingPlanes = [hp]
backMat.stencilFail = IncrementWrapStencilOp
backMat.stencilZPass = IncrementWrapStencilOp

/* 正面材质 */
const frontMat = baseMat.clone()
frontMat.side = FrontSide
frontMat.clippingPlanes = [hp]
frontMat.stencilFail = DecrementWrapStencilOp
frontMat.stencilZPass = DecrementWrapStencilOp
copy( material : material ) :拷贝材质。
dispose():释放此材质的GPU资源。当材质不需要时,就要调用此方法将其清理掉。
与此同时,材质中的纹理也需要调用其dispose()方法进行清理。
onBeforeCompile ( shader : Shader, renderer : WebGLRenderer ): 在编译着色器程序之前执行的回调函数。其回调参数是着色器和渲染器。适用于修改内置材质。
代码实例:
const geo = new SphereGeometry()
const mat = new MeshLambertMaterial()
mat.onBeforeCompile = function (shader) {
    shader.fragmentShader = `
      void main(){
        gl_FragColor=vec4(0,0,1,1);
      }
      `
}
const mesh = new Mesh(geo, mat)
scene.add(mesh)
在上面的代码里我在着色器编译之前直接把原来的片元着色器给覆盖了,最后画出一个纯色物体:
当然,其实际作用不是用来覆盖着色器的,而是用来修改的,至于如何修改,我会另起一篇文章来说。
customProgramCacheKey () :如果使用了onBeforeCompile,则此回调可用于标识onBeforeCompile中使用的数值,因此three.js可以根据需要重用缓存的着色器或重新编译此材质的着色器。
setValues( values : Object ):通过键值对设置材质的属性。
代码示例:
const mat = new MeshLambertMaterial()
mat.setValues({
    color: new Color(0x000000),
    emissive: new Color(0xffffff),
})
toJSON( meta : Object ):将材质数据转json。
16-ShaderMaterial
当你遇到内置材质实现不了的效果的时候,那就需要自定义着色器了。
three.js 中有两个自定义材质:
- ShaderMaterial 自定义材质,在其中会有一些three.js提前定义好的常用变量。
- RawShaderMaterial 原始材质,比ShaderMaterial 材质更加原生和灵活,可以用来制作完全自定义的着色器。
ShaderMaterial的基本用法如下:
const geo = new SphereGeometry()
const mat = new ShaderMaterial({
    uniforms: { time: { value: 0 } },
    vertexShader: `
    uniform float time;
    varying vec3 v_position;
    void main() {
      gl_Position = projectionMatrix * modelViewMatrix * vec4( position, 1.0 );
      gl_PointSize=(sin(time*0.005+gl_Position.y*1.5)*0.5+0.5)* (gl_Position.z )*5.0 +5.;
      v_position=position;
    }
  `,
    fragmentShader: `
    uniform float time;
    varying vec3 v_position;
    void main(){
      float dist=distance(gl_PointCoord,vec2(0.5,0.5));
      if(dist<0.5){
      gl_FragColor=vec4( cos(time*0.005+v_position.x )*0.5+0.5, sin(time*0.005 + v_position.y*3.)*0.5+0.5,0,(0.5-dist));
      }else{
        discard;
      }
    }
  `,
    transparent: true,
    blending: AdditiveBlending,
})
const mesh = new Points(geo, mat)
scene.add(mesh)
效果如下:
解释一下上面的代码。
uniforms 定义的是uniform 变量。
attribute 变量需要在BufferGeometry 中定义,这个我们在说自定义几何体时说过。
varying 变量直接写在着色器中即可。
vertexShader和fragmentShader定义的是顶点着色器和片元着色器,其着色器并不是所有的着色器内容,ShaderMaterial还内置了一些常用的变量,比如position、projectionMatrix等。
我们可以在WebGLProgram中查看ShaderMaterial内置的变量。
ShaderMaterial和RawShaderMaterial都是继承自Material 对象的,所以我们在其中可以正常使用Material属性,比如transparent,blending等。
17-RawShaderMaterial
RawShaderMaterial 是比ShaderMaterial更原生的材质,在其中没有内置常用变量,所以像position、projectionMatrix 之类的变量都需要我们自已来定义。
RawShaderMaterial的用法和ShaderMaterial类似:
const material = new THREE.RawShaderMaterial( {
    uniforms: {
        time: { value: 1.0 }
    },
    vertexShader: document.getElementById( 'vertexShader' ).textContent,
    fragmentShader: document.getElementById( 'fragmentShader' ).textContent,

} );